
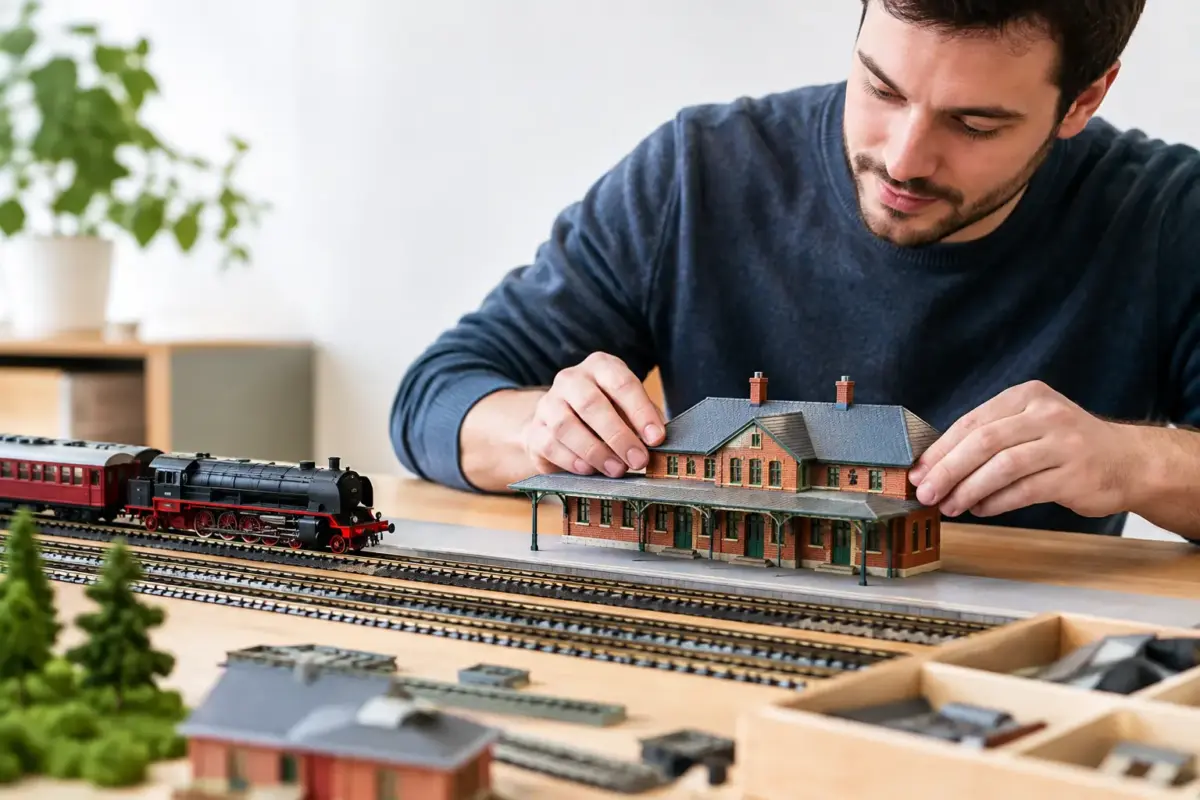
A station building that is a few millimetres too large can make a carefully planned platform look wrong. A goods shed with a perfectly painted finish can still feel out of place if it belongs to the wrong era. Railway building kits are not simply attractive additions around the track: they establish the scale, location and working purpose of a model railway scene.
Choosing well at the start makes every later decision easier, from platform furniture and road vehicles to figures, scenic materials and weathering. Whether you are building a compact branch-line terminus or a busy main-line depot, the most convincing layouts begin with buildings that fit the railway they are meant to serve.
Start with Scale, Footprint and Period
Scale is the first non-negotiable. OO gauge buildings are normally produced at 1:76 scale, while N gauge uses 1:148. A building may look close enough in a product image, but mixing scales is immediately noticeable beside platforms, doors, vehicles and figures. Check the stated scale before buying, particularly with accessories that may be listed by gauge rather than by a ratio.
Footprint matters just as much. Measure the available depth behind the platform, the clearance from the track, and the space required for road access or a loading bank. A grand station frontage can dominate a small layout, whereas a low-relief warehouse or terrace can create the impression of a town without consuming valuable scenic space.
The period of the layout should guide the architectural style. A Victorian stone station, a small Great Western goods shed and a weathered coal office make sense together on a pre-grouping or steam-era scene, but they need careful context beside a modern diesel depot. This does not mean every building must represent the exact same year. Real railways retain older structures for decades. The key is to create a believable mixture, not an accidental one.
Decide what the building does
Before choosing a kit, give it a job. Passenger stations, signal boxes, engine sheds, goods sheds, warehouses, crossing cottages and lineside huts all tell the viewer something about how the railway operates. A small rural station may need a modest building, lamp room, goods facilities and a road approach. A town scene could support a larger station, retaining walls, commercial premises and industrial sidings.
Working purpose also helps determine placement. A signal box needs a clear relationship with points and signals. A coal stage belongs where locomotives can reach it. A warehouse needs a loading dock, yard surface and a reason for wagons or lorries to be nearby. These small decisions make a static building feel part of a working railway.
Choosing Between Railway Building Kit Materials
Railway building kits are available in several materials, each offering a different balance of detail, assembly time and scope for modification. There is no single best option. The right choice depends on your experience, preferred construction method and the role the model will play on the layout.
Plastic kits are often the most approachable. They commonly use injection-moulded parts with positive location points, separate doors and windows, and brick or stone textures already moulded into the walls. A good plastic kit is durable and straightforward to adapt with styrene sheet, replacement doors or added guttering. Careful removal of mould seams and a dry fit before gluing will improve the final result considerably.
Laser-cut card kits can offer excellent architectural character and fine surface detail, especially for low-relief buildings, platforms and structures with complex window arrangements. They reward accurate cutting, test fitting and restrained adhesive use. Too much glue can warp card, so apply it sparingly and allow assemblies to dry flat. Sealing exposed edges and internal surfaces before painting helps prevent moisture-related movement.
Resin kits frequently provide crisp detail and distinctive prototypes that are not easily reproduced in plastic. They may need more preparation, including washing to remove mould-release residue, cleaning flash and checking parts for warping. Use an adhesive suitable for resin, and take time to test fit larger walls or roof sections before committing.
MDF and wood-based kits can be especially useful for larger structures and modular scenic elements. They are generally sturdy, but exposed edges benefit from priming and finishing. Whatever material you choose, use a sharp craft knife, fine sanding sticks, a steel rule and a cutting mat. Clean, square joins are more valuable than rushing to complete the kit in one session.
Build for a Better Finish
It is tempting to glue a building together and paint it afterwards, but many kits are easier to finish in sub-assemblies. Walls, roof sections, doors, window frames and interior floors are usually more accessible before final assembly. Read the instructions through first and identify parts that will be difficult to reach once the roof is fitted.
Prime the material where appropriate, particularly resin, MDF and photo-etched components. For plastic, a thin primer coat is still useful because it reveals sanding marks and gives paint a consistent surface. Apply several light coats rather than one heavy pass that fills brick courses, stone joints or timber texture.
Brickwork rarely looks convincing as one flat red-brown colour. Start with a base shade, then introduce variation with subtly different tones on selected bricks or panels. A thin wash can deepen mortar lines and recesses, while dry brushing picks out raised texture. Stone benefits from gentle tonal variation too, but avoid making every individual block a different colour. Real masonry has variation, yet it also reads as a coherent surface from normal viewing distance.
Window glazing deserves patience. Fit it only after painting the frames and walls, handling clear plastic with clean hands or tweezers. A light dusting on the inside of glazing, a partly open door or a simple printed interior can add character without requiring full internal detail. For buildings near the front of a layout, interior lighting and a basic floor plan can be worthwhile. For a background warehouse, strong external texture and suitable colour may matter more.
Roofs, gutters and signs make the difference
Roofs are highly visible from the usual viewing angle, so they should not be treated as an afterthought. Slate, tile and corrugated surfaces benefit from subtle colour variation, darkening near valleys and downpipes, and a little accumulated dirt where water would run. Keep weathering proportional. A rural station roof may be faded and mossy, while a recently repaired industrial roof should look cleaner.
Add guttering, drainpipes, signs, lamps, benches, chimney pots and external wiring where suitable. These are small details, but they create scale cues. A station nameboard, enamel advertising sign or coal merchant notice can establish place and period quickly. Check that signage matches the intended railway company or later regional identity if accuracy is the goal.
Make Buildings Belong to the Scene
A building placed directly on bare baseboard almost always appears unfinished. Set it into the landscape with a foundation edge, platform surface, yard paving, ballast transition or narrow strip of earth. Even a modest scatter of weeds around a drainpipe or wall base breaks the sharp line where model meets ground.
Think about how people and vehicles would reach the structure. A station needs paths from the entrance to the platform. A goods shed benefits from a hardstanding area, loading doors and room for carts, vans or lorries. Engine-shed scenes need ash, oil staining, coal dust and worn ground rather than neat grass right up to the doors.
Weathering should follow use rather than habit. Steam-era buildings may show soot around chimneys, smoke staining beneath eaves and grime on platform canopies. Industrial structures may have damp staining, rust streaks and heavily worn thresholds. A small signal box could be comparatively well kept, with dirt concentrated around the steps and base. Study where rain, smoke, hands, boots and machinery would leave their marks, then build effects gradually with washes, pigments and dry brushing.
Avoid placing every building parallel to the board edge. A slight angle, a narrow road behind a station, or a partially hidden rear wall can make a scene feel much deeper. Low-relief structures are particularly effective along the back of a layout, where they suggest streets and industry beyond the railway boundary without demanding a large footprint.
Plan the Whole Project Before You Buy
A building kit is more satisfying when the supporting materials are ready. Alongside the kit itself, consider the adhesives, primer, base colours, weathering products, glazing, scenic scatter and figures needed to complete its setting. Matching products by scale and task avoids the familiar pause halfway through a build when a vital detail is missing.
At Scale Model Shop, specialist modellers can source railway buildings alongside paints, tools and scenic materials for the wider scene, with knowledgeable support available when compatibility is uncertain. That is especially useful when combining different kit materials or planning a layout project over several stages.
Choose one railway building that has a clear purpose on your layout, give it enough space to breathe, and finish the ground around it as carefully as the walls. It will soon become the feature that makes the rest of the railway feel as though it has always been there.
