
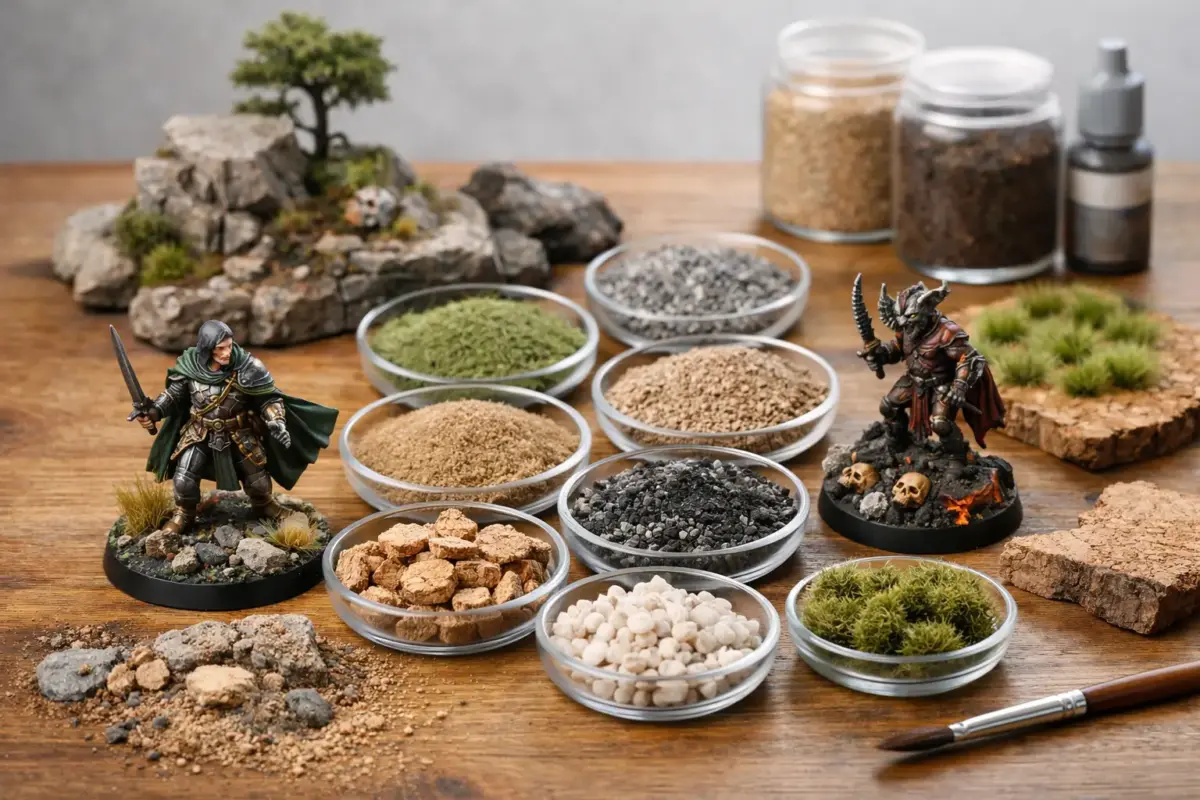
A well-finished base does more than fill the space beneath a figure or vehicle. It establishes scale, terrain, season and atmosphere before the viewer notices a single painted detail. This guide to miniature basing materials is designed to help you choose products that work together, whether you are finishing a 28mm wargaming figure, a 1:35 armour vignette, a 1:48 aircraft display or a small railway scene.
The best material is not necessarily the most realistic item in the packet. It is the one that reads correctly at your chosen scale, suits the story of the model and remains securely attached through handling and display. A fine scatter may look convincing beside a 1:72 vehicle but disappear beneath a 54mm figure, while an oversized tuft can turn a carefully painted base into a garden in miniature.
Start with the Ground You Want to Represent
Before selecting grass, stones or debris, decide what lies underneath. Most natural terrain begins with a soil, sand, mud, rock or paved surface. That foundation guides every later choice, including colour, texture and the density of vegetation.
For dry earth, desert and track surfaces, fine sand, sifted earth and dedicated scenic scatter provide a useful starting point. Use finer grades for smaller scales, particularly 1:72, 1:76 and 15mm gaming pieces. Coarser grades are more convincing on 1:35 armour bases, larger figures and railway layouts where individual grains need to remain visible.
Mud benefits from a little variation. Texture paste or acrylic ground effects can be worked into ruts, tyre tracks and boot prints before drying. Adding a few different tones of pigment, earth scatter or fine sand while the surface is still wet prevents the finish looking like one flat brown coating. A wet mud effect is effective in moderation, usually in low points, around wheels and along the edges of puddles. Covering an entire base in gloss makes even a rainy scene look artificial.
Rocky ground needs a mixture of forms rather than one bag of identical stones. Cork bark makes excellent broken rock faces and can be trimmed easily with a knife. Slate chips suit layered sedimentary rock, while resin rock castings offer repeatable detail for more formal diorama work. Blend the edges into the ground with paste, sand and small debris so each piece appears embedded rather than placed on top.
A Guide to Miniature Basing Materials by Texture
Texture is where a base becomes believable. Natural ground is uneven, but miniature terrain still needs restraint. Build it in layers, beginning with the largest features and working down to the smallest material.
Sands, grit and ballast
Fine sand is among the most versatile basing materials. It can represent dry soil, beach sand, worn tracks, rubble and the fine aggregate found around industrial areas. Modelling ballast and graded grit give more pronounced texture, making them useful for railway embankments, armour displays and larger scenic bases.
Apply loose material over PVA glue, then allow it to dry completely before sealing it with a diluted adhesive or dedicated scenic fixer. Sealing matters: unsealed sand can shed during painting, handling or transport. Avoid ordinary beach sand unless it has been thoroughly cleaned and sifted, as inconsistent grain size and organic material can cause problems.
Texture pastes and ground effects
Acrylic texture pastes are a practical option when you need a durable surface with less loose scatter. Fine-grain pastes suit compacted earth and small-scale groundwork, while rougher formulations create churned mud, stony soil and damaged verges. They can be applied directly to MDF, plastic, resin or cork bases, though a primer coat can improve adhesion and make later painting more predictable.
Ready-made ground effects save time, especially for wet mud, snow, puddles and urban rubble. Their trade-off is control. You can achieve more individual variation by building your own layers with paste, pigments and scatter, but pre-mixed products are reliable for repeatable results and are particularly useful when working across a unit of miniatures.
Cork, stones and rubble
Cork is a staple for good reason. Broken by hand rather than cut cleanly, it creates convincing fractured earth, cliff edges and ruined concrete. Small stones, slate fragments and crushed plaster add weight to rocky scenes, while brick dust, tiny lengths of wire and plastic offcuts can suggest demolition debris in urban settings.
Keep an eye on scale. A stone that looks modest on the workbench may read as a boulder beside a 28mm figure. Place a miniature or vehicle on the unfinished base regularly to check proportions and preserve a sensible route for feet, tracks or wheels.
Vegetation: Static Grass, Flock and Tufts
Vegetation should support the terrain rather than hide it. Real grass rarely grows in an even carpet, particularly on roadsides, battlefields, dry fields and frequently used paths. Leave bare patches and vary the length and colour of your fibres.
Static grass gives the most natural upright finish when applied with an applicator, but it can also be pinched into PVA glue in small amounts. Short fibres work well for lawns, close-cropped ground and smaller scales. Longer fibres are better for neglected verges, field edges and larger display bases. A blend of two or three related shades usually looks more convincing than a single bright green tone.
Flock is useful for low vegetation, moss and distant texture, but it can look soft or fuzzy if used as the main grass layer. Apply it sparingly around rocks, tree roots and damp corners, then break it up with static grass or fine leaf scatter.
Self-adhesive grass tufts are one of the quickest ways to add focus and height. They work especially well around stones, fence posts, ruined walls and the feet of figures. Supplement the adhesive with a small amount of PVA or super glue for permanence, particularly on gaming miniatures that will be handled often. Choose muted, varied colours for most British and European settings; vivid green tufts can suit spring scenes but easily dominate a base.
Leaf litter, laser-cut leaves and fine turf add seasonal character. Brown and ochre leaf scatter suggests autumn woodland, while pale dry fibres and sparse scrub suit late-summer fields. Snow deserves a separate approach: apply it after the main ground is painted and weathered, concentrating it where wind, shade and terrain would allow it to collect. Clean white snow over every surface is rarely the most convincing choice.
Match Material Size to Scale and Subject
Scale is not just a kit-box number. It determines how strongly texture should show. At 1:72 and 1:76, use fine sand, short fibres and restrained tufts. Large pebbles and tall grass can overwhelm a small vehicle or aircraft. At 1:35, stronger surface texture, larger stones and longer vegetation become viable, though they should still be chosen against the size of a human figure.
For 28mm and 32mm wargaming miniatures, durability often matters as much as realism. A base may be picked up hundreds of times, moved across gaming tables and stored in foam trays. Use firmly bonded materials, keep fragile branches or tall grass away from the rim, and seal loose pigments where practical. Display miniatures allow more delicate detailing, but only if they can be transported safely.
Subject also changes the material choice. A tank base can carry deep ruts, crushed vegetation and track debris. An aircraft base should usually remain lower and cleaner around the wheels, unless you are representing a rough forward airstrip. Naval subjects may need water effects, dockside timber, bollards or weathered concrete rather than terrestrial grass. For railway scenes, ballast profile, drainage and the placement of weeds are central to the realism.
Paint, Weather and Tie the Base to the Model
Even excellent scenic products benefit from paint. Prime porous materials where needed, then use a darker base coat and build lighter dry-brushed tones across raised texture. This gives sand, cork and paste a unified appearance. An airbrush is useful for subtle tonal shifts across larger bases, while a brush gives more control around figures and groundwork details.
Pigments are particularly effective for dust, dry earth and accumulated grime. Apply them after most painting is complete, concentrating them where movement would disturb the ground: behind tracks, around boots, on lower hulls and along road edges. Fix them lightly if the piece will be handled. Heavy fixing can darken pigments, so test the effect on a spare base first.
The model and base should share a few visual cues. If the ground is dusty, carry a little of that dust onto tyres, boots or track guards. If the base is wet, add restrained damp staining to the lower areas of the vehicle or figure. This connection is what stops a perfectly finished miniature appearing to stand on a separate piece of scenery.
Plan a Complete Basing Project
It is easier to build a coherent base when materials are chosen as a small system: groundwork, texture, vegetation, paint and finishing effects. Scale Model Shop stocks scenic supplies alongside paints, pigments, adhesives and modelling tools, which helps when you need compatible products for a complete build rather than a single packet of scatter.
Test new materials on spare plastic, old bases or offcuts of MDF before committing them to a finished model. You will quickly learn how a paste shrinks, how a grass colour dries and whether a particular stone grade looks right beside your chosen scale. The most memorable bases are rarely the busiest ones – they simply make the miniature look as though it belongs there.
