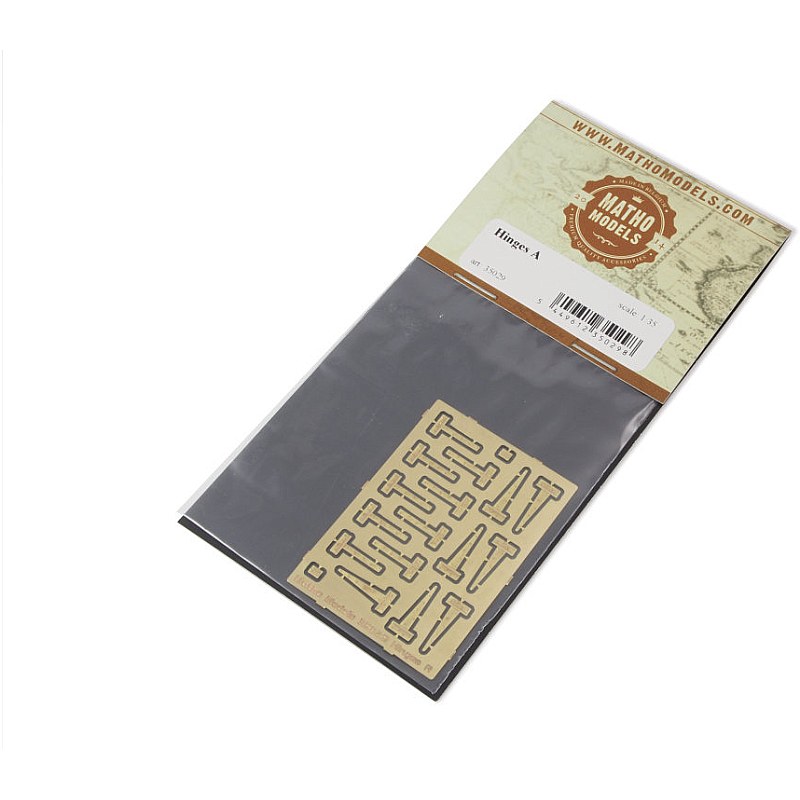
Matho Models Hinges A (1/35) 35029
Out of stock
SKU: MAT35029
MPN: 35029
 Matho Models
Join the waitlist
Enter your email below and we will notify you when this item is back in stock.
Matho Models 1/35 Hinges A
Add finely detailed hinges to your 1/35 modelling projects with Hinges A from Matho Models. This photo-etch fret contains 18 hinges in three different styles and sizes, providing a useful selection of straight, angled and smaller hinge details.
The fret includes nine large straight hinges, seven large angled hinges and two small hinges. Each hinge consists of two sections that can be bent in either direction relative to each other, allowing the angle to be adjusted to suit the required position. A photo-etch bending tool is recommended for the best results. Doors and windows are not included.
18 Bendable Photo-Etched Hinges
The combination of straight, angled and small hinges provides flexibility when adding individual hinge details to a 1/35 project. The two-section construction means the parts aren’t limited to staying flat: each hinge can be carefully bent and angled before fitting to achieve the required position.
With nine large straight examples and seven large angled examples, the fret provides multiple matching hinges for repeated use, while the two smaller hinges add another option for finer details.
Painting and Fitting the Hinges
Leave the hinges attached to the fret during the initial painting and weathering. Airbrush a layer of enamel paint and allow it to dry for 24 hours. The harder enamel layer helps reduce the chance of paint scratching during subsequent handling. Add a second enamel layer after 24 hours for extra protection before continuing with acrylic or enamel colours and weathering products.
Place the fret on a hard surface such as wood or glass and cut each hinge free with a fresh knife. Clean any remaining fret-attachment residue with a micro file. Use a photo-etch bending tool to angle the two sections of each hinge as required, then handle the finished part gently with tweezers while glueing it into position.
After cutting, bending and fitting, touch up any areas where the brass has become visible using the main colour and a very fine-tipped brush. This final step restores the painted finish while retaining the fine detail of the photo-etched hinges.