
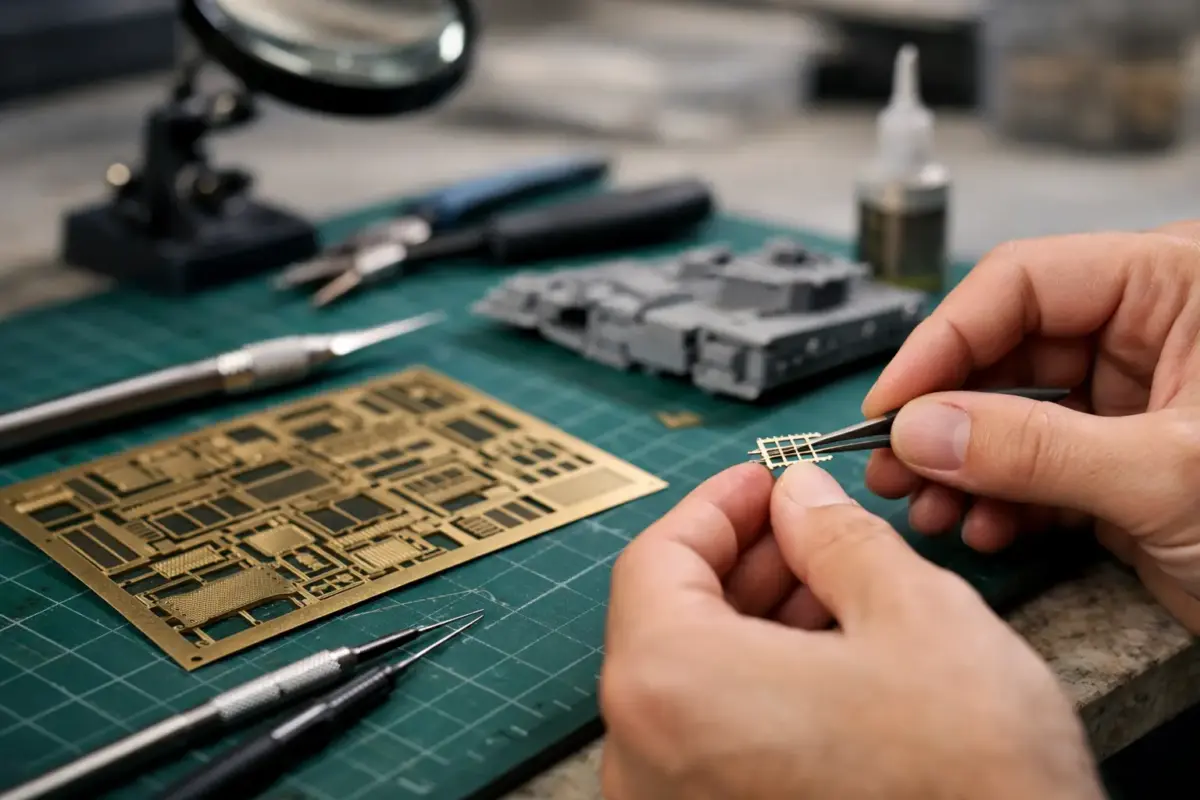
Photo-etched brass can turn a good kit into a far more convincing scale model, but it has little patience for rushed handling. If you are learning how to build photo etch, the key is not simply fitting smaller parts. It is preparing each piece cleanly, making accurate folds, and using the right adhesive in the smallest possible amount.
Photo etch, often shortened to PE, is most commonly supplied as a thin brass fret. It replaces moulded plastic details that would otherwise be too thick at scale: aircraft seat belts, ship railings, armour engine grilles, tool clamps, cockpit levers and radar arrays are familiar examples. The result can look remarkably fine, provided the brass is treated as a precision material rather than just another kit part.
Choose the right photo etch for the build
Not every kit needs a full detail set. A straightforward aircraft cockpit may benefit most from seat belts and instrument panels, while a modern warship can be transformed by railings, ladders and aerials. For armour, engine screens, mudguard brackets and stowage fittings often offer the most visible improvement.
Check the scale, kit manufacturer and kit number before choosing a set. Photo etch is designed around particular tooling, and even closely related variants can have different hatch layouts, vents or cockpit arrangements. Also consider whether the set is intended as a basic upgrade or a comprehensive replacement package. The latter can include hundreds of parts and may require cutting away kit detail, so it is best suited to a build where you are happy to slow the process down.
Pre-painted and self-adhesive sets can save time in cockpits and vehicle interiors, especially where printed dials and placards are involved. Standard brass gives more freedom for painting and weathering, but requires priming before colour coats. Neither option is automatically better. It depends on the subject, the finish you want, and how much handling the area will receive.
Tools that make photo etch manageable
A sharp blade and ordinary tweezers will get you started, but a few specialist tools remove much of the frustration. Work over a smooth, well-lit surface, ideally with a shallow tray or cutting mat beneath the fret. Small parts have an impressive ability to disappear into carpet.
For regular PE work, the most useful tools are:
- a hard cutting surface, such as glass, ceramic tile or a smooth steel block;
- a fresh scalpel blade or single-edge cutter for separating parts;
- fine pointed tweezers, plus flat-jawed tweezers for holding folds;
- a photo-etch folding tool or a smooth flat blade for longer bends;
- a fine sanding stick, diamond file or fibreglass pencil for cleaning attachment points;
- a needle, cocktail stick or fine applicator for placing adhesive.
Avoid cutting directly on a soft self-healing mat where possible. The brass can flex down into the surface and bend as the blade passes through the attachment tabs. Place the fret flat on a hard surface, hold it close to the tab with a blade or tweezer tip, then cut with a controlled downward motion. Do not twist the part free. That is how railings acquire kinks before they have even left the fret.
How to build photo etch parts cleanly
Start by studying the instructions and identifying the fold lines. Most frets use a half-etched line to show where brass should bend. The line normally belongs on the inside of the fold, but check the drawing and test the orientation before committing. A single reversed fold can make a box, bracket or seat frame impossible to fit.
Remove one or two parts at a time rather than cutting out a whole section of the fret. Place the piece in a small container or on a strip of low-tack tape with its part number written nearby. This is especially useful with naval sets, where dozens of nearly identical supports and handrails may be required.
Once removed, gently clean the tiny remaining tabs with a fine file. Use as few strokes as possible. Thin brass can be distorted by aggressive sanding, and a rounded edge can make a part sit poorly against plastic. If a component has a curved edge, such as an aircraft cowling detail or a turret guard, form it gradually around a drill bit, paintbrush handle or other round former of the correct diameter. Never try to force a tight curve in one movement.
Making sharp, square folds
For a simple fold, position the etched line at the edge of a folding tool or steel ruler. Clamp the part firmly but lightly, then lift the free section with a razor blade. Bring it up in stages until it reaches the required angle. Long bends benefit from a dedicated folding tool because it keeps the line straight across the entire part.
Tiny tabs can often be folded with flat tweezers. Grip directly along the etched line and rotate the part rather than squeezing and bending at the tips. This produces a cleaner crease and reduces the risk of marking visible surfaces.
Many PE assemblies are designed as small boxes, bins or frames. Dry-fit every fold before gluing. If the parts meet cleanly, the geometry is right. If there is a gap, identify the incorrect angle now, not after adhesive has cured. Brass tolerates a small correction, but repeated bending back and forth will fatigue it and may cause it to snap.
Pick the adhesive for the job
Cyanoacrylate, commonly called super glue or CA, is the usual adhesive for attaching photo etch to plastic, resin and metal. Thin CA flows into close-fitting joints and works well for flat parts such as armour grilles. Medium or gel CA gives more control on a raised bracket, hatch handle or seat frame. Apply it from a tiny pool using a fine wire, needle or stretched sprue rather than squeezing glue straight from the nozzle.
For delicate parts that need a little adjustment time, PVA-based canopy glue can be useful. It dries clear and is less likely to fog clear plastic, making it suitable for light-duty items inside canopies or on display models. Its bond is not as strong as CA, so it is not the right choice for stressed joins or external railings likely to be handled.
Two-part epoxy is worth considering for larger brass assemblies or parts that need a stronger, gap-filling bond. It cures more slowly, but that can be an advantage when positioning a complex radar frame or sizeable armour fender. Soldering is another option for experienced modellers building substantial brass structures, particularly ship fittings, but it demands practice, heat control and a suitable work area. For most kit upgrades, careful CA application is the practical choice.
Use less glue than you think you need. A shiny puddle around a finely etched part immediately spoils the scale effect. If excess CA appears, leave it to cure fully before carefully removing it with a sharp blade or fine abrasive. Trying to wipe wet adhesive usually spreads it across the surrounding detail.
Prime and paint brass with confidence
Brass is smooth, and paint can chip if applied directly to an unprepared fret. Degrease the parts first with a gentle wash or wipe, allowing them to dry completely. A light coat of a suitable primer gives acrylic, lacquer and enamel paints something to grip.
There are two sensible painting approaches. Larger assemblies can be built first, primed, and then painted as one unit. This makes joins easier to hide but can leave awkward corners difficult to reach. Alternatively, paint parts while they are still attached to the fret, then remove and touch in the attachment points after fitting. This works well for seat belts, instrument panels and flat screens, though paint can crack along a fold if the coat is too heavy.
For aircraft interiors and armour fittings, attach PE before the main weathering stages so washes, dust and chipping tie the brass into the rest of the model. Ship railings are often safer fitted near the end, after the major hull painting and decalling are complete. They remain vulnerable until the model is on its base, so plan the order of work around handling as much as appearance.
Common photo etch problems and practical fixes
Bent railings and antennae are usually recoverable. Lay the piece on a hard surface and gently roll a smooth handle over it, or ease it straight with flat tweezers. Work slowly and use several light adjustments rather than one hard bend.
If a part launches from the tweezers, pause before reaching for a replacement. A torch held low across the bench can reveal the shadow of brass far better than overhead lighting. If it has gone beyond recovery, spare fret material can sometimes provide a replacement strip, bracket or handle. It may not reproduce an intricate part, but it can save a project.
The more difficult issue is over-detailing. Photo etch should improve the model’s appearance at normal viewing distance, not add complexity for its own sake. A well-fitted grille and a clean set of seat belts often make more difference than an interior packed with parts that cannot be seen once the fuselage or turret is closed.
Treat your first PE set as a skill-building exercise rather than a test of speed. Begin with a visible, forgiving component, keep the adhesive under control, and dry-fit more often than feels necessary. Before long, those impossibly thin brass pieces will become another enjoyable part of the build.
