
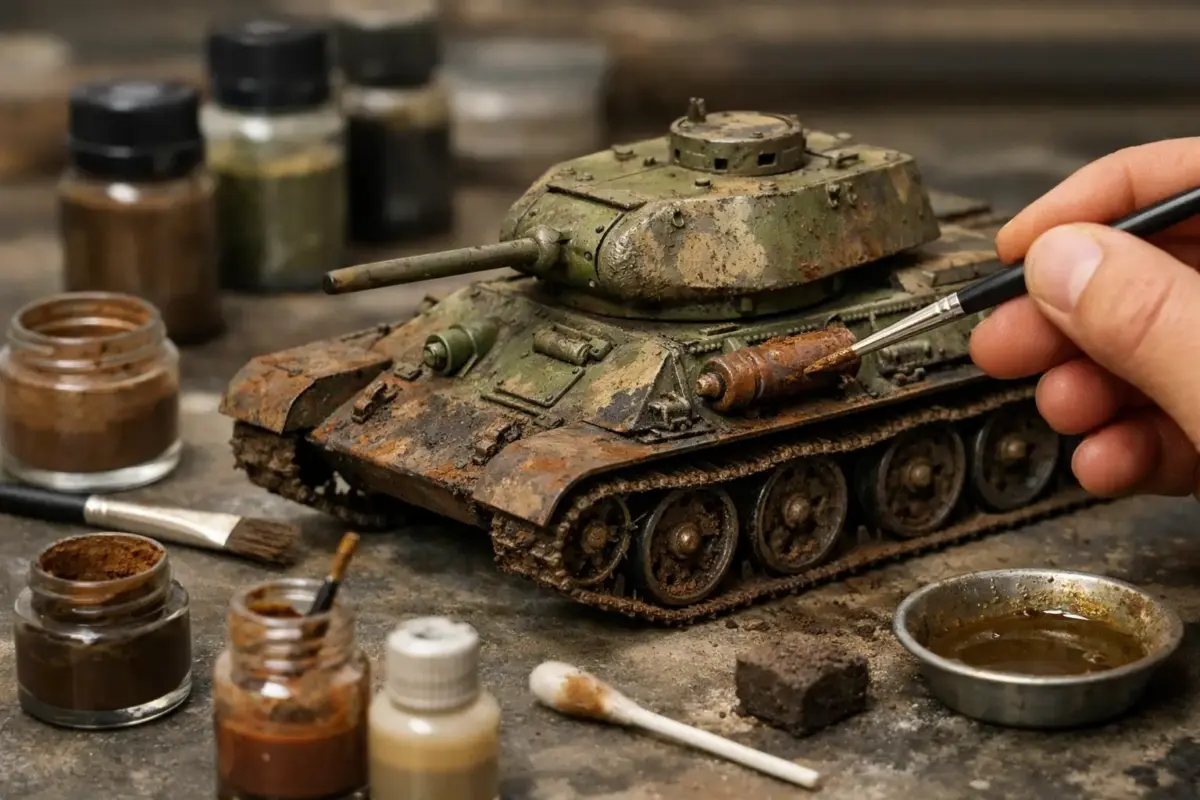
A clean paint job can look impressive, but armour rarely stayed clean for long. Dust settled into the running gear, rain marked vertical plates, fuel stains built up around filler caps, and worn edges showed bare metal beneath the paint. That is why weathering products for model tanks matter – they help turn a neatly painted kit into a vehicle that looks used, convincing and properly scaled.
For many modellers, the challenge is not whether to weather, but what to buy first. The market is full of washes, filters, streaking grime, pigments, mud pastes, chipping fluids and pencils, often from several leading brands and in finishes that can seem very close at first glance. In practice, each product type does a different job. Once you understand where each one fits in the process, choosing becomes much easier.
What weathering products for model tanks actually do
Weathering is not one single effect. It is a group of finishing techniques that add depth, wear and environmental context. On a model tank, that might mean darkening recesses around bolts and weld seams, fading the base coat, adding scratches to hatches, or building up dried earth around the lower hull.
The best results usually come from layering subtle effects rather than applying one heavy product and hoping it carries the whole finish. A pin wash can define detail, a filter can shift the tone of the camouflage, pigments can soften the look of the running gear, and a few restrained streaks can suggest rain marks or grime. Each step adds something different, and not every build needs every category.
That is worth remembering if you are buying supplies for a specific project. A factory-fresh parade vehicle needs a different product mix from an Eastern Front winter tank or a desert subject covered in fine dust.
Start with washes and panel liners
If you are building your first weathering set-up, washes are usually the most useful place to begin. A wash is a thin, low-viscosity product designed to run into recesses and around raised detail. On armour kits, that makes it ideal for bolts, hinges, panel joins, weld beads and engine deck grilles.
A dark brown or dark grey wash often looks more natural than pure black, especially on green, sand or three-tone camouflage. Black can be effective on very light finishes or heavily shadowed areas, but it can also look stark at smaller scales. That is one of the most common trade-offs in armour finishing – strong contrast photographs well, but subtler tones usually look more convincing in person.
Pin washes are especially helpful because they target detail without staining broad flat areas too heavily. If you prefer more overall tonal variation, a general wash can be used more widely, but it requires better control and a suitable gloss or satin surface underneath.
Filters and fading products
Filters are often misunderstood because they do not create dramatic change on their own. Instead, they slightly alter the tone of the base paint and help tie colours together. On a tank with hard-edged camouflage, a filter can reduce that freshly painted look and make the finish feel more cohesive.
This is particularly useful on olive drab, dunkelgelb and Soviet green schemes, where a model can otherwise appear a little flat. A carefully chosen filter can warm the colour, cool it down or add a dusty cast. Used lightly, it adds realism. Used too heavily, it can muddy the finish and reduce contrast.
Fading products and oil-based rendering colours work in a similar space, though with more visible effect. These are useful if you want to break up large flat panels, especially on 1:35 subjects where turret sides and hull plates can benefit from tonal variation. On smaller scales, the same treatment needs a lighter hand.
Chipping products and wear effects
Chipping is one of the most popular armour weathering effects, but it is also one of the easiest to overdo. Real tanks did chip, especially around hatches, tool clamps, fenders and crew traffic areas, but not every surface was covered in exposed metal.
For controlled chips, many modellers use fine brushes and dedicated chipping colours. This gives excellent placement and works well for edge wear and isolated scratches. Chipping fluids and hairspray-style techniques offer a different result, allowing larger areas of worn paint over primers or temporary finishes such as whitewash. These products are particularly effective for winter vehicles, heavily worn Soviet subjects and vehicles with field-applied camouflage.
The key is to match the effect to the story of the vehicle. Bare steel on every panel edge may look dramatic, but it rarely looks scaled. Dark brown chips often work better than metallic tones because many worn areas show oxidised or dirty underlayers rather than bright metal.
Streaking grime, fuel stains and fresh marks
Vertical surfaces on tanks benefit from streaking effects because they break up plain areas and suggest exposure to rain, dust and accumulated grime. Dedicated streaking products are formulated to leave fine marks that can be softened with thinner, giving you more control than a standard wash.
This category includes rain marks, rust streaks, grime tones and engine-related staining. Again, restraint matters. A few varied streaks around handles, bolts and joins often look far better than covering every surface evenly.
Fuel and oil stain products are useful around filler caps, engine decks and maintenance areas. Glossier finishes help here because real fresh spills catch the light. That said, not every stain should be shiny. Older spills tend to dry darker and flatter, so mixing sheen levels gives a more believable result.
Pigments, mud and dust for lower hulls
If one product family defines armour modelling, it is probably pigments. They are excellent for representing dust, dry earth, soot and accumulated dirt, particularly on wheels, tracks and lower hull areas. They can be applied dry for a soft dusty finish or fixed with thinner or pigment fixer for a more durable effect.
The advantage of pigments is their texture and softness. Paint alone often struggles to recreate the look of fine road dust or dried earth. Pigments solve that, though they can become too uniform if used in a single tone. Combining light dust, medium earth and darker damp shades usually gives a more realistic result.
Mud pastes and textured earth products go a step further by adding body. These are ideal for heavy build-up on suspension units, track guards and hull sides. Some include grit for extra texture, while others are smoother and better suited to dried splatter. The trade-off is scale realism – coarse texture can look convincing in 1:16 or 1:35, but it may appear oversized on 1:72 armour unless applied very carefully.
Tracks need their own approach
Tank tracks reward careful weathering because they carry so much visual weight. A single metallic dry-brush over black paint is quick, but it rarely captures the complexity of real track finishes. Most tracks show a mix of dark oxidised metal, polished contact points, earth tones and dust.
A better approach is to build the effect in layers. Start with a suitable dark base, then add washes for depth, pigments for dust or soil, and restrained metallic highlighting only on the guide teeth, edges and contact surfaces. Track wash products, rust tones and earth pigments all have a place here, depending on the terrain and period.
This is also where compatibility matters. Vinyl tracks, link-and-length assemblies and metal aftermarket tracks each take products slightly differently, so testing on a hidden section is always sensible.
Choosing by build type, not by hype
The easiest way to overspend is to buy every weathering bottle in a range before starting the kit. Most tank projects do not need that. A practical starter selection would usually include a pin wash, a dust or earth pigment, a streaking product, a chipping colour and one mud or grime option suited to your subject.
From there, add specialist items for the finish you want. Winter whitewash may justify chipping fluid. Desert vehicles benefit from dust effects and light earth pigments. Late-war urban subjects may need more soot, rubble tones and rain streaking. If you build across several armour subjects, neutral products tend to earn their place fastest.
Brand preference often comes down to workflow. Some modellers favour enamel-based weathering systems for their working time and blendability, while others prefer acrylic products for quicker drying and easier clean-up. Neither is automatically better. It depends on your workspace, your confidence with thinners and the finish you want to control.
A sensible order of application
Most weathering products for model tanks perform best when used in a clear sequence. After base painting and decals, a protective varnish helps prepare the surface. Washes and filters generally come first, followed by chipping and streaking effects. Pigments, dust and mud are often left until later because they sit on top of the finish and can obscure earlier detail if applied too soon.
Varnish choice also affects behaviour. Gloss surfaces help washes flow cleanly, while matt finishes grip pigments better. Satin sits somewhere in the middle and is often a practical compromise. There is no single correct finish for every stage, but understanding how the surface changes the product is one of the biggest steps towards predictable results.
Build a finish that suits the vehicle
The best weathering is rarely the heaviest. It is the weathering that suits the vehicle, the theatre, the scale and the story you are trying to tell. A training-ground Chieftain, a desert Panzer IV and a late-war IS-2 should not all wear the same dust, grime and chipping pattern.
That is why choosing weathering products is less about collecting bottles and more about selecting the right tools for the result. If you build methodically and add effects with purpose, even a small set of well-chosen products can carry a model a long way. And if you are unsure where to start, it is always worth choosing a few reliable basics first and letting the build tell you what it needs next.
