
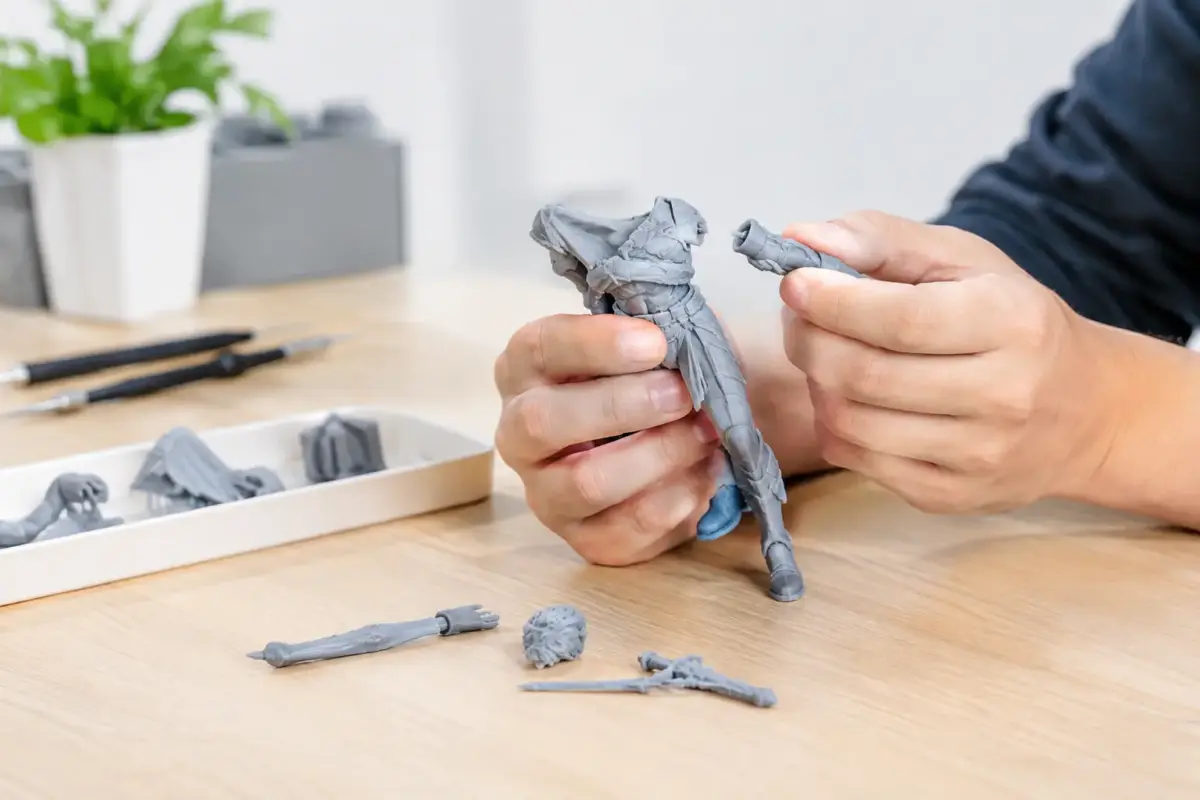
A finely sculpted resin figure can look superb straight from the box, but resin figure assembly is where its final quality is often decided. A clean fit at the neck, natural contact between boots and groundwork, and firmly pinned arms will do more for a convincing display piece than rushing ahead to paint. The material rewards careful preparation, especially on larger scales where a small gap can become very visible.
Resin kits vary widely. Some arrive with crisp joins and minimal clean-up; others need more adjustment around casting blocks, keyed sockets and separate equipment. Treat the instructions as a guide, but let repeated test-fitting determine the actual build sequence.
Prepare the parts before resin figure assembly
Start by checking every part against the instructions before removing anything. Look for casting blocks, fine straps, thin weapon parts and alternative heads or hands. A quick inspection helps you identify joints that will need reinforcement and prevents a small component disappearing during clean-up.
Resin is commonly cast using a mould-release agent. Even when it is not obvious, residue can interfere with primer, paint and glue. Wash the parts in warm water with a little washing-up liquid, using a soft toothbrush to work gently into folds, undercuts and textured clothing. Rinse them thoroughly and allow them to dry fully before assembly.
Do not sand or saw resin dry if you can avoid it. Resin dust is an irritant and should not be breathed in. Wet-sand whenever practical, wear suitable respiratory protection when cutting or filing, and keep the work area clean. This is particularly relevant when removing substantial casting plugs from feet, torsos or large scenic bases.
A razor saw is usually the best choice for thick casting blocks. Cut slightly away from the final surface, then reduce the remaining material with a sanding stick or file. Slow progress is preferable to taking too much from a boot sole, a sleeve cuff or the edge of a coat. Fine casting seams can normally be removed with a fresh scalpel blade, drawn lightly along the line rather than pressed into the resin.
Test-fit every major joint
Dry-fitting is not a formality. It reveals whether the pose reads correctly before glue makes correction difficult. Assemble the torso, legs and head loosely, then view the figure from the front, side and above. On a standing figure, check that the weight appears to sit naturally through both feet or through the intended leading leg.
If a joint rocks, identify the high spot rather than simply filling the gap later. A few careful passes with a sanding stick can improve the mating surfaces considerably. For a neck joint, ensure the head angle suits the figure’s direction of travel and the position of the arms. A head turned a fraction too far can make an otherwise excellent sculpt look disconnected.
Warm water can help correct a mildly warped rifle barrel, sword, banner pole or thin limb. Immerse the affected piece briefly in hot, not boiling, water, straighten it with gentle pressure, then cool it in cold water to set the shape. Resin can soften quickly, so work cautiously and avoid forcing fragile details.
Pinning gives resin figures lasting strength
Pins are worth adding wherever a joint is narrow, load-bearing or likely to be handled during painting. They are especially useful for ankles, arms holding weapons, separate heads, mounted figures and large-scale torsos. A pinned join has mechanical strength as well as adhesive strength, making it much less likely to fail after the figure is mounted on a base.
Use a pin vice and a drill bit that suits the scale of the joint. Drill a shallow hole into both mating surfaces, then use brass rod, steel wire or a straightened paper clip as the pin. Test the fit before gluing. The pin should seat securely without pushing the pieces apart.
For a straightforward, close-fitting join, a quality cyanoacrylate adhesive is usually sufficient. Apply a small amount to avoid a brittle, messy bead around the seam. For heavy parts, uneven surfaces or joins that need a little working time, two-part epoxy adhesive is often the better choice. It takes longer to cure, but it can bridge minor irregularities and gives you time to check alignment.
A practical approach is to pin and glue the legs to the torso first, then assess the balance on the base before fitting arms, equipment and delicate accessories. If the figure will be painted in subassemblies, drill and pin the parts now, but hold off on final assembly until the difficult areas are painted.
Fill seams without losing sculpted detail
Even good resin kits can show a fine seam at the shoulders, waist or around separate hands. Use the filler according to the size and character of the gap. Thin seams may only need a small amount of cyanoacrylate adhesive, smoothed after curing. Wider gaps benefit from a modelling putty that can be shaped while soft.
Two-part epoxy putty is particularly useful for restoring fabric folds, fur texture, webbing and hair. Keep tools damp with water so the putty does not stick, then blend the repair into the existing sculpt. Work in small amounts. It is easier to add a second application than to remove excess putty from a detailed uniform.
For hard-edged areas such as armour plates, equipment cases or weapon stocks, a finer surface filler may produce a sharper result. Let every filler cure fully before sanding. Primer is the best test: a light coat will immediately show whether the seam has vanished or whether more work is needed.
Plan subassemblies around the painting process
The best assembly order depends on the figure. If a separate arm covers the chest straps, or a weapon runs across the torso, paint access may be much better if those components remain separate. The same applies to shields, backpacks, large helmets and mounted rider-and-saddle arrangements.
There is a trade-off. More subassemblies make painting easier, but they also create more joins to protect from paint and more pieces to handle. Aim to separate only the areas that would otherwise be genuinely inaccessible. Before priming, temporarily hold the parts together with their pins and make sure the visual lines still flow naturally.
Mount each subassembly on a temporary handle. Corks, painting grips and wood offcuts all work well, provided the part is secure and the pin does not obscure a visible area. This makes it easier to rotate the component while priming and painting, without touching fresh paintwork.
Prime for a reliable paint finish
A dedicated hobby primer gives acrylics, lacquers and enamel-based weathering products a dependable surface to grip. Choose the colour to suit the intended finish: black supports dramatic shadows and metallic areas, grey is a balanced all-round choice, and white or light grey helps preserve bright uniform colours and pale flesh tones.
Apply several light coats rather than one heavy pass. Resin figures are full of undercuts, and excessive primer can soften the very detail that attracted you to the kit. Once dry, inspect the surface under a strong lamp. Look closely at the tops of shoulders, between fingers, under collars and around the base of boots, where missed seams and mould lines tend to reveal themselves.
If you have left parts separate, keep their contact points free from heavy primer and paint. A clean gluing surface produces a stronger final bond. It can also be useful to leave a small unpainted area beneath a foot or inside a scenic base socket for the final pin-and-glue stage.
Make the final fit part of the finish
Final assembly should feel controlled, not like a last-minute rescue. Remove paint from hidden bonding surfaces, dry-fit the pins again, then use the adhesive appropriate to the load. Check the pose from normal viewing distance as well as close up. The eye notices a tilted rifle, floating boot or misaligned hand immediately.
For a displayed figure, the groundwork is part of the assembly. Drill into the base, use strong pins in the feet, and confirm the stance before committing to glue. A small amount of groundwork texture can be blended around the soles afterwards, helping the model look placed in its setting rather than merely attached to it.
Careful resin figure assembly is not about adding unnecessary stages. It is about solving the structural and access issues while they are still easy to solve. With the right adhesives, pinning materials, fillers, primers and precision tools to hand, each figure starts its paintwork on a sound footing – and Scale Model Shop can help you gather the essentials for the whole project in one order.