
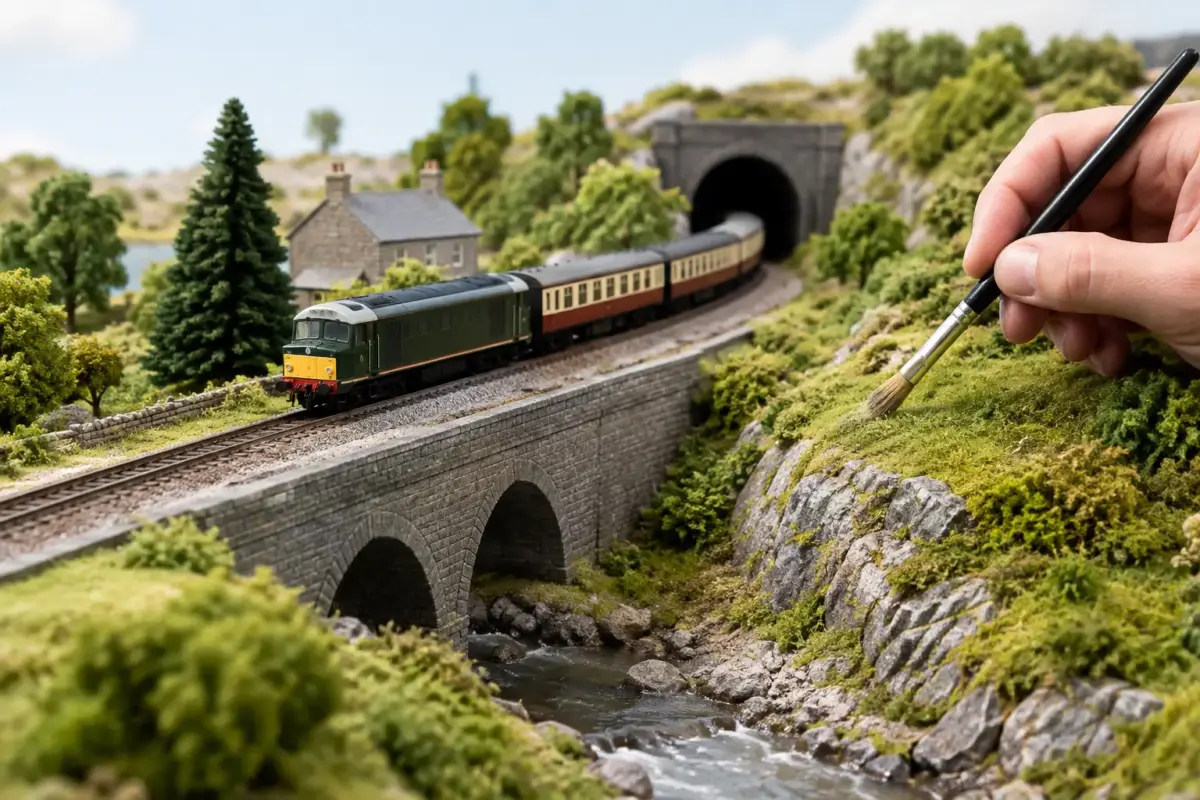
A convincing railway scene is rarely about one spectacular item. It is the relationship between track, ground, vegetation, buildings and accumulated grime that makes a layout feel as though trains genuinely belong there. This model railway scenery guide focuses on those relationships, helping you select materials that work together and apply them in a practical order.
Start with the railway, not the grass
Real railways shape the landscape around them. Before adding scenic material, decide what sort of line you are representing: a neglected rural branch, a busy main line, an industrial siding, a preserved station or an urban goods yard. Each demands different track condition, land use and levels of maintenance.
A well-kept passenger route may have neatly profiled ballast, trimmed verges and carefully painted station structures. By contrast, a lightly used siding benefits from patchy ballast, weeds between sleepers, rusty rail sides and stained hardstanding. The scenery should explain why the railway is there and how it has been used.
It also helps to set a period and location early. British post-war scenes often suit coal dust, brick structures, soot-stained stonework and more restrained vegetation. A modern image may need cleaner lines, security fencing, cable trunking, contemporary road markings and brighter plastics. You do not need to copy a particular prototype exactly, but a clear visual reference stops the layout becoming a mixture of unrelated details.
Match every scenic choice to the scale
Scale affects more than the size of locomotives and wagons. Ballast grading, grass fibre length, wall texture, tree height and the size of discarded items all need to look credible beside the track. Oversized scatter can make an otherwise carefully built OO gauge scene appear coarse, while foliage that is too fine may disappear completely on a larger scale.
For OO and N gauge, use fine ballast and fine turf as the starting point, then introduce a few slightly coarser textures selectively for brambles, rough ground or leaf litter. Static grass is particularly useful because fibres add vertical life that flat scatter cannot provide. Short fibres suit maintained verges and lawns; longer lengths are better for embankments, field edges and neglected corners.
Trees deserve restraint. Many layouts use too many mature trees, all of a similar height and colour. Mix saplings, hedgerow growth, bushes and a smaller number of taller specimens. Position them with a reason: along field boundaries, beside watercourses, behind buildings or where inaccessible ground has been left unmanaged.
Build landforms before adding surface texture
The most effective scenery has believable levels. A cutting, embankment, drainage ditch or raised road gives the railway a place in the terrain. Even a compact layout gains depth when the ground is not completely flat.
Lightweight scenic formers, insulation foam, card formers and plaster-based coverings all have a place. Foam is quick to carve and works well for broad contours. Card strips and plaster cloth are useful where you want flowing slopes. For a small baseboard, simple layers of cork or foam can form a convincing bank without adding excessive weight.
Avoid creating slopes that rise sharply from the edge of the ballast. Real trackbeds often have a shoulder, a shallow ditch or a gradual change into surrounding ground. Leave room for this transition. It is one of the details that separates a railway placed on scenery from a railway built into it.
Once the shape is secure, apply an earthy base colour before using scatter. Brown, grey-brown and muted green tones prevent pale baseboard material showing through. Vary the ground colour as well. Soil near a track may be darker from oil, brake dust and damp, while a dry bank may show lighter exposed earth beneath the vegetation.
Ballast is a scenic material, not just track filling
Ballast is usually the first texture viewers notice, particularly at eye level. Its colour, profile and cleanliness establish whether a route is active, neglected, rural or industrial. Fine-grade model ballast should be laid in thin, controlled layers rather than poured into a deep ridge.
Use a small brush to keep grains clear of sleeper tops and rail webs. Shape the ballast shoulder before fixing it with a suitable adhesive mix, then check point blades and moving parts remain free. A misted wetting agent helps adhesive flow through the material rather than forming surface beads.
Fresh ballast can look stark. Tone it down with diluted earth colours, grey washes and carefully applied weathering powders. Keep the centre of the four-foot darker on well-used track and add oily deposits around depots, fuelling points and carriage sidings. The trade-off is simple: heavy weathering creates atmosphere, but it can overwhelm a scene if every inch of rail looks abandoned.
Layer grass, weeds and ground cover
Natural ground is irregular. It contains bare earth, short growth, long grass, dead vegetation and colour changes caused by traffic, drainage and the season. Apply scenic textures in layers rather than trying to achieve the finish with one green scatter.
Begin with fine turf or blended scatter over the painted base. Add static grass in patches, using several shades rather than one uniform colour. Olive, straw, dark green and faded brown usually create a more useful palette than bright green alone. Work around likely growth patterns: grass becomes sparse beside paths, taller at fence lines and more aggressive where access is difficult.
Tufts, clumps and foliage materials work best as accents. Place weeds between sleepers sparingly, especially on a maintained running line, but use them more freely around buffers, loading banks, drains and derelict structures. A few carefully placed brambles can make an unused corner feel established; a solid blanket of foliage can hide the railway you have worked to build.
Hedgerows, trees and fields
Hedgerows should have an uneven top line and a varied depth. Add darker material low down, then lighter foliage on exposed upper surfaces. A narrow gap, a leaning fence post or a patch of bare hedge base gives the impression of age and maintenance.
For fields, avoid a single flat green finish. Crop rows, rough pasture, tractor marks and changes in grass length all tell a clearer story. A field that sits lower than the track, separated by a ditch and fence, will look far more convincing than one that simply meets the ballast shoulder.
Give structures a proper setting
A station building or lineside hut can be well made yet still look unconvincing if it sits directly on loose grass. Most structures need a foundation, a paved edge, a yard surface or worn ground around the entrance. Fit buildings into the scenery with fine gravel, paving sheets, textured filler or painted hardstanding.
Weather buildings according to their use. Soot and water staining often collect beneath chimney stacks, window ledges, gutters and roof joints. Goods sheds may show scuffed doors, oil marks and darker traffic routes, while a small country station might have cleaner paint but worn paths and rain-streaked masonry.
Roads need the same attention. A road surface should have a slight crown or drainage logic, muted colour variation and worn edges where grass encroaches. Add road markings only where they suit the period and location. A narrow lane beside a rural halt may need little more than a faded surface, hedges and tyre-worn verges.
Add the details that explain the scene
Details work best when they answer a practical question. Why is there a pallet here? Who uses this gate? Where does rainwater go? Why is this patch of ground bare? A coal yard might need retaining walls, coal dust, sacks, tools and uneven surfaces. A modern depot may call for fencing, warning signs, cable runs, bins and service cabinets.
Do not spread figures and accessories evenly across the layout. Group activity where it makes sense, then leave quieter areas quiet. Negative space is valuable, particularly around rural track and open sidings. It gives the viewer’s eye somewhere to rest and makes busy scenes feel more purposeful.
A practical model railway scenery guide to finishing
Before calling a scene finished, view it from normal operating height rather than directly above. Check for exposed baseboard edges, repeated colours, abrupt joins between materials and trees that tower unrealistically over stock. Take photographs as well: the camera is excellent at revealing shiny adhesive, overly bright scatter and details that are out of scale.
Keep a small selection of earth pigments, static grass, fine scatter, tufts and weathering materials available for final adjustments. Scenic work is rarely completed in one pass. A touch of dust on a platform edge, a darker wash in a drain or a few extra weeds beside a buffer stop can bring separate elements together.
Choose materials for the scene you are building, not simply because they look effective in the packet. With a clear prototype idea, compatible textures and patient layering, every section of track can feel rooted in its own believable piece of railway country. If you are planning the project from baseboard to final weathering, Scale Model Shop can help bring the required scenic supplies together in one order.
