Silvering over a smooth paint finish is one of those problems that can spoil an otherwise tidy build. That is exactly why decal solutions for model kits matter. Used properly, they help markings grip the surface, conform over raised or recessed detail, and lose that obvious carrier film look that makes decals stand out for the wrong reason.
For many modellers, decals are left until the final stretch of a project, then rushed. The result is usually familiar – roundels bridging panel lines, stencils floating over rivets, or nose art wrinkling on compound curves. A good decal setting and softening routine is not complicated, but the right product choice depends on the decal itself, the surface underneath, and how aggressive you can afford to be.
What decal solutions for model kits actually do
The term covers two related jobs. First, there are setting solutions, which improve adhesion and help the decal settle onto the painted surface. Second, there are softening solutions, which make the decal film more pliable so it can pull down into recessed lines, around bolt heads, or over surface texture.
Some brands separate those jobs into two bottles. Others offer a single solution that does a bit of both. Neither approach is automatically better. If you build across aircraft, armour, ships and figures, having both a gentler setter and a stronger softener usually gives you more control.
That control matters because decals vary a lot. Cartograf-printed sheets are often thin and well behaved. Older kit decals, thick aftermarket markings, or some budget sheets can be much stiffer. Put a strong softener on a very thin decal and it may fold, tear or distort. Use a mild product on a stubborn thick decal and it may never properly conform.
Start with the surface, not the bottle
Before choosing a solution, look at the finish underneath. A gloss or satin surface gives the decal the best chance of settling without trapping tiny air pockets. A dead matt finish is where silvering often starts, because the microscopic texture under the carrier film catches air.
That does not mean every model needs a showroom gloss coat from start to finish. It means the area receiving decals should be smooth enough to accept them cleanly. On aircraft and racing subjects, that often means an overall gloss coat before decalling. On armour or figures, where markings may be limited, a local gloss patch can be enough.
Cleanliness matters too. Dust, sanding residue and fingerprints can interfere with adhesion just as effectively as a rough finish. If decals are struggling, the problem is not always the solution. Sometimes the surface simply was not ready.
Setting solution vs softening solution
A setting solution is the safer starting point. It is usually brushed onto the model before the decal is positioned, or dabbed around it once in place. Its main job is to help the decal bed down and bond to the paint layer.
A softening solution is more active. Once the decal is positioned and excess water is removed, the softener is applied over the top. The film often wrinkles as it reacts. That looks alarming if you have not seen it before, but it is usually normal. The key is to leave it alone while it works. Touching the decal at this stage is the quickest way to tear it.
If you are dealing with recessed panel lines, louvre vents, Zimmerit, cast armour texture or ribbed control surfaces, the stronger product earns its place. If you are applying tiny maintenance stencils to a flat fuselage side, a mild setter may be all you need.
Choosing decal solutions for model kits by task
For standard kit decals on a smooth gloss finish, a mild to medium setting product is often enough. This is the safest option for modern decals and small stencil data, especially where sharp alignment matters.
For thicker decals, older sheets or markings that need to wrap around curves, move to a stronger softening product. This is common on aircraft nose markings, ship hull numbers over subtle plating detail, or large armour insignia crossing weld seams and bolts.
For very delicate aftermarket decals, especially thin film decals designed to disappear into the paintwork, start cautiously. Test one spare item from the sheet first. Not all thin decals tolerate aggressive chemistry, and once they begin to distort there is rarely a clean way back.
Water-slide decals and transfers for figures or miniatures can be another mixed case. Small curved areas, such as shoulder plates or shields, may need significant softening, but the decals themselves are often tiny and easy to overwork. In that situation, less solution and more patience usually gives the better result.
A practical application routine
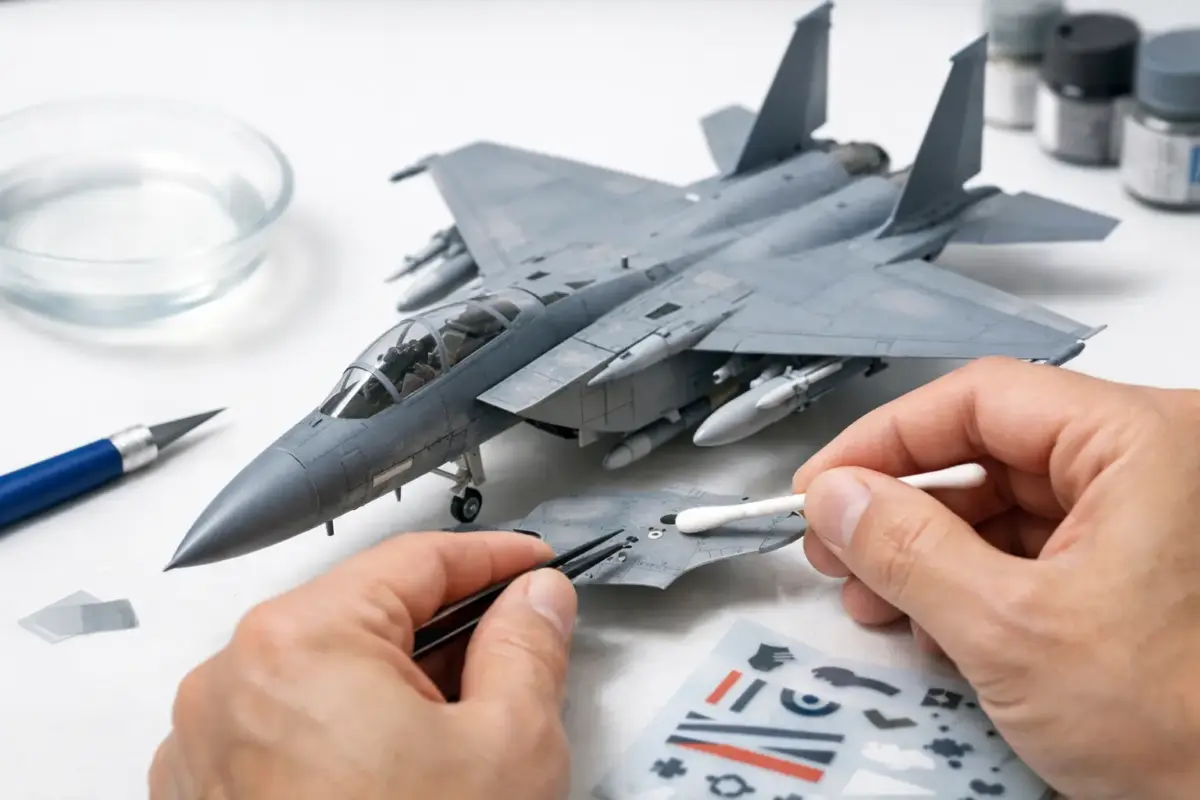
The most reliable method is simple. Cut the decal close to the printed area, soak it according to the sheet instructions, and prepare the model surface with a little clean water or setter. Slide the decal into place with a soft brush, then wick away excess moisture with a cotton bud or lint-free tissue.
Once the decal is aligned, press it down gently to remove trapped water and air. If it still bridges detail, apply a small amount of softening solution over the top and let chemistry do the work. Do not drag the brush across the decal once it starts reacting.
After it has dried fully, inspect it under a strong light. If panel lines are still not showing through, a second application may be needed. Stubborn areas can sometimes be persuaded with careful pressure from a damp cloth or cotton bud once the decal is nearly dry, but only if the film is still intact and not overly softened.
Common problems and what usually fixes them
Silvering is the one most builders recognise. It appears as a frosty or silvery effect under the carrier film. Usually it means air is trapped beneath the decal. A smoother base coat helps prevent it, but once it appears, light pricking with a fresh blade followed by more solution can often rescue it.
Wrinkling causes more panic than it should. During softening, many decals crinkle before flattening out. Leave them alone unless the wrinkle remains after full drying. If it does, another light application may settle it. If the decal has folded onto itself, though, you may need to replace it.
Poor adhesion around edges often comes from too much water left underneath. Gently pressing the decal down before applying softener helps. If an edge lifts later, a little setter beneath the flap can usually secure it.
Tearing and distortion usually mean the solution was too strong, the decal was handled while soft, or both. This is where testing spare markings pays off. Decal chemistry is never completely universal.
Different subjects, different demands
Aircraft builders often rely most heavily on decal solutions because of extensive stencil data, panel lines and compound curves around noses, spines and drop tanks. Carrier film shows quickly on clean paint schemes, so good settling matters.
Armour modellers may use fewer decals, but the surfaces can be trickier. Cast texture, weld beads, anti-slip coatings and Zimmerit all challenge stiff decals. In some cases, paint masks are a better option for large national markings, with decals reserved for finer detail.
Ship modellers face long hull markings, deck markings and fine draught indicators where alignment is just as important as adhesion. Softening strength needs to be balanced against the risk of stretching thin numbers or stripes out of shape.
For figures, sci-fi kits and Gundam subjects, decals often land on strongly curved parts with glossy painted finishes. Here, the right solution can make the difference between a marking that looks printed on and one that clearly looks applied afterwards.
When not to rely on decal solution alone
There are times when the best answer is not more chemistry. Very old decals may need a decal film restorer before use. Cracked or brittle sheets can disintegrate in water long before any softener becomes relevant.
Likewise, oversized carrier film should be trimmed where possible. No bottle will make a wide clear border truly invisible on a matt, dusty or heavily textured surface. Good prep and careful trimming still matter.
Sealing decals afterwards is the final part of the job. Once fully dry, a clear coat protects them and helps blend the finish. Gloss, satin or matt depends on the subject and the weathering plan, but do allow the decal solutions time to cure first.
If you are building regularly, it is worth keeping both a mild setter and a stronger softener on the bench, alongside spare cotton buds, soft brushes and a sharp blade. That gives you options across different brands, scales and surface types, which is far more useful than expecting one bottle to solve every decal problem. Scale Model Shop customers often build across several subjects, and decal behaviour can change just as much as paint chemistry or plastic quality from one kit to the next.
The best decal finish rarely comes from force. It comes from matching the solution to the decal, preparing the surface properly, and giving each stage enough time to work.