
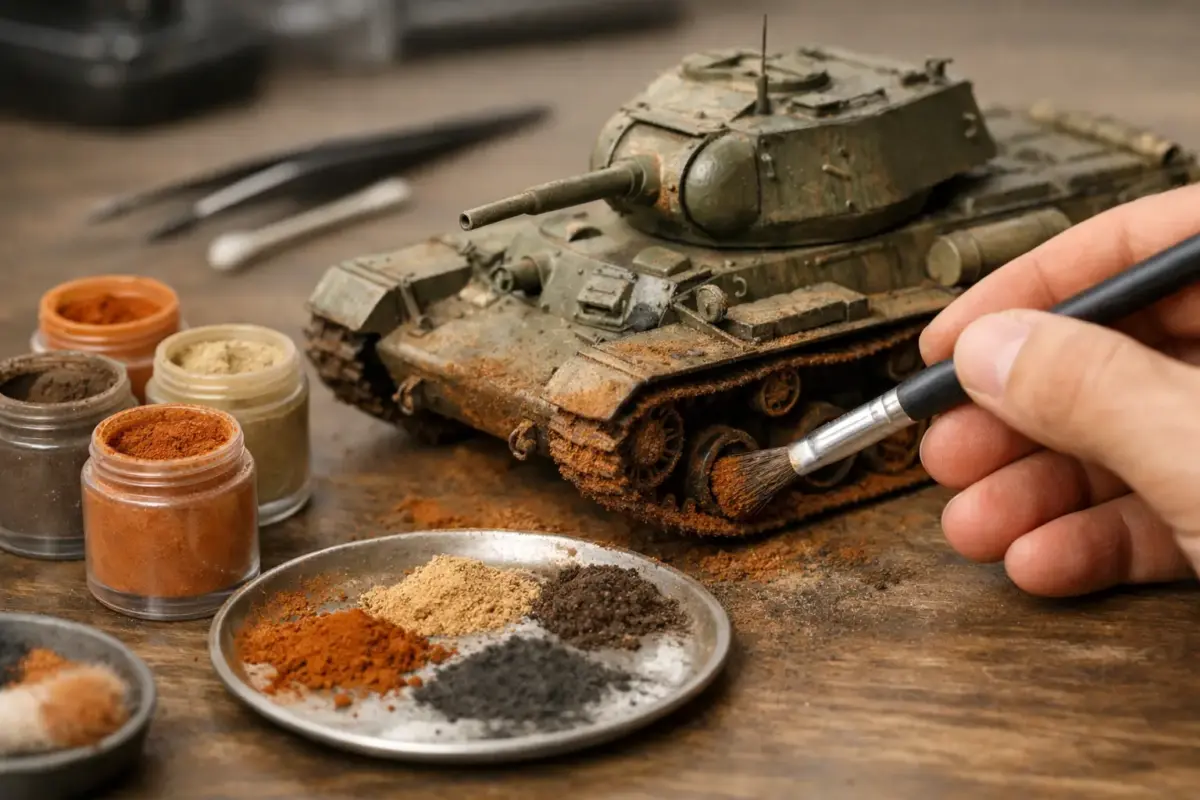
A perfectly painted model can still look as though it has just left the factory. Pigment powders are one of the most effective ways to remove that clean, uniform finish and add the dust, earth, soot and oxidised texture that give a model a sense of scale and use. Learning how to use pigment powders is less about finding a single correct technique and more about controlling where the effect appears, how intense it is and whether it needs to survive handling.
Unlike a wash or acrylic paint, pigments are dry, ultra-fine coloured powders. They sit on the surface rather than forming a solid paint film, which is why they can produce exceptionally convincing dusty finishes. They also remain easy to adjust until fixed, making them useful for aircraft, armour, ships, railway scenes, figures and wargaming miniatures.
What pigment powders are best used for
Pigments are particularly good at recreating matt, powdery finishes that would be difficult to achieve with paint alone. Buff, sand and earth shades work well for road dust, dried mud and disturbed ground. Dark brown and reddish tones can build rust staining, while black, dark grey and blue-black pigments are useful for exhaust soot, gun smoke and oily grime.
The key is to choose colours that suit both the setting and the scale. A 1:72 aircraft operating from a dry forward airfield may need a pale, restrained dusting, whereas a 1:35 tank in wet European conditions can take deeper earth tones and textured mud. On smaller scales, strong contrast can quickly look exaggerated. A little pigment usually reads better than a heavily coated surface.
Pigments are not just for military subjects. A light grey-brown deposit brings road vehicles and railway rolling stock to life; black pigment adds convincing soot around a steam locomotive’s chimney; and ochre, green and earth shades help blend buildings into a diorama base.
How to use pigment powders: prepare the surface first
Apply pigments towards the end of the painting process, after the main colours, decals and most weathering are complete. A matt or satin varnish gives dry pigment something to grip, while a very glossy surface can make it slide about or gather unnaturally in corners.
That does not mean every model needs a full varnish coat before pigments. If the paint finish is already matt and durable, you can work directly over it. However, a protective coat is sensible when you have used delicate decals, enamel washes or acrylic finishes that may be affected by later weathering steps.
Before opening the pot, decide what the model has been doing. Where would dust collect? Which surfaces receive exhaust staining? Would crew traffic polish away dirt from steps and hatches? This simple planning prevents random weathering. On real vehicles, dirt gathers in recesses and around running gear, but raised edges, handles and frequently touched areas can remain cleaner.
Use a soft, worn brush for broad applications and a smaller stiff brush for working pigment into panel lines, wheel hubs, track links or textured groundwork. Keep a clean, dry brush nearby for blending and removing excess. A cotton bud can also be useful, but use it lightly as it can lift too much powder or leave fibres behind.
Start dry and build the effect gradually
The most forgiving method is dry application. Pick up a small amount of pigment, tap most of it back into the lid or palette, then work it onto the model with gentle dabbing, stippling or brushing motions. Begin with the lightest tone and increase depth slowly with darker shades.
For dust on an aircraft, apply pale earth or grey-buff pigments along wheel wells, tyres, lower fuselage surfaces and around access panels. Draw the effect backwards with a soft brush where airflow would carry dirt. Avoid coating every panel evenly. Dust should have direction and variation, not look like a filter laid over the entire airframe.
On armour, work dry pigments into suspension units, track guards, lower hull corners and the joins between road wheels. Different shades layered together look more natural than one uniform brown. A warm earth tone can sit closest to the vehicle, with a lighter, drier dust colour brushed over the outer surfaces.
For exhaust staining, place dark pigment close to the exhaust opening first, then fade it outward with a wider soft brush. Keep the centre dense and the outer edge soft. Black alone can look harsh, so mixing in dark brown or grey often produces a more realistic result, especially at smaller scales.
Dry pigments can be left unfixed on display models, but they remain vulnerable to fingerprints, dusting and transport. This is often acceptable for a model that will sit safely in a cabinet. For gaming pieces, competition travel or models handled regularly, fixing the pigment is usually the better choice.
Fixing pigments without losing the finish
A dedicated pigment fixer, enamel thinner or odourless thinner can draw powder into the surface and make the result more durable. The trade-off is that wetting pigments normally darkens them and can reduce their dusty appearance. Test the method on a spare part, old kit piece or unseen area before committing to a large section.
Load a fine brush with fixer and touch it beside the pigment rather than brushing through it aggressively. Capillary action will pull the liquid across the powder. Leave it to dry fully before deciding whether more pigment is needed. This approach is especially effective for wheel arches, tracks, groundwork and other recessed areas.
For a soft dusty finish, apply pigment dry, then use minimal fixer only in the places that need security. You can also fix a lower layer, then add a final light dry layer over the top. This gives the depth of built-up dirt while preserving the chalky look of fresh road dust.
Avoid spraying a heavy varnish coat directly over pigments. It can make them disappear, turn them patchy or produce a dark, damp-looking finish. If a final sealing coat is necessary, use a very light mist from a suitable distance and accept that some colour change is likely. Many experienced modellers treat pigments as the final weathering stage for this reason.
Creating mud, rust and textured deposits
Pigment powders become more versatile when mixed with other weathering materials. For dried, caked mud, combine earth pigments with an acrylic resin, pigment binder or textured mud product. Apply the mixture around track runs, wheel arches and lower hulls with an old brush. Stipple the surface while wet to avoid a smooth, painted look.
Fresh mud needs more contrast. Start with a dark, damp base near the wheels or tracks, then add lighter dry pigment around the edges once the first layer has dried. A small amount of gloss or satin medium can suggest wetness, but reserve it for the lowest, most recently soiled areas. Wet mud across an entire vehicle rarely looks convincing.
Rust pigments work best as part of a layered finish rather than as a single orange patch. Build a dark brown or red-brown foundation, add restrained orange-brown highlights, then use a fine brush to remove or soften the edges. Rust forms where water sits, paint fails or parts are exposed, such as exhausts, bolt heads, damaged edges and abandoned equipment. It should follow the construction of the object.
On ship models, very fine vertical streaks beneath scuppers, drain points and fittings can suggest rain-marked corrosion. Apply a tiny amount of pigment, then pull it down with a barely damp brush. The scale matters greatly here: broad streaks that look dramatic on a 1:35 vehicle may overwhelm a 1:700 destroyer.
Common pigment powder mistakes
The usual problem is not choosing the wrong product. It is applying too much too quickly. If the model looks uniformly dusty, use a clean brush to lift pigment from upper surfaces, leading edges and areas likely to be cleaned by crew activity or rain.
Another common issue is using a single shade everywhere. Real dirt varies according to moisture, local soil, heat and exposure. Even a modest combination of light dust, medium earth and dark grime creates more depth than one heavy coat.
Finally, protect yourself and your workspace. Pigments are very fine powders. Work in a ventilated area, avoid blowing excess powder away, and consider a suitable dust mask when using larger quantities. Keep pots closed when not in use, particularly if you share a hobby space with children or pets.
Pigments reward observation more than force. Start with a light application, compare it with reference photographs or the story of your model, and add only what the subject needs. A few carefully placed deposits can turn an excellent build into a model that feels convincingly lived in.
