
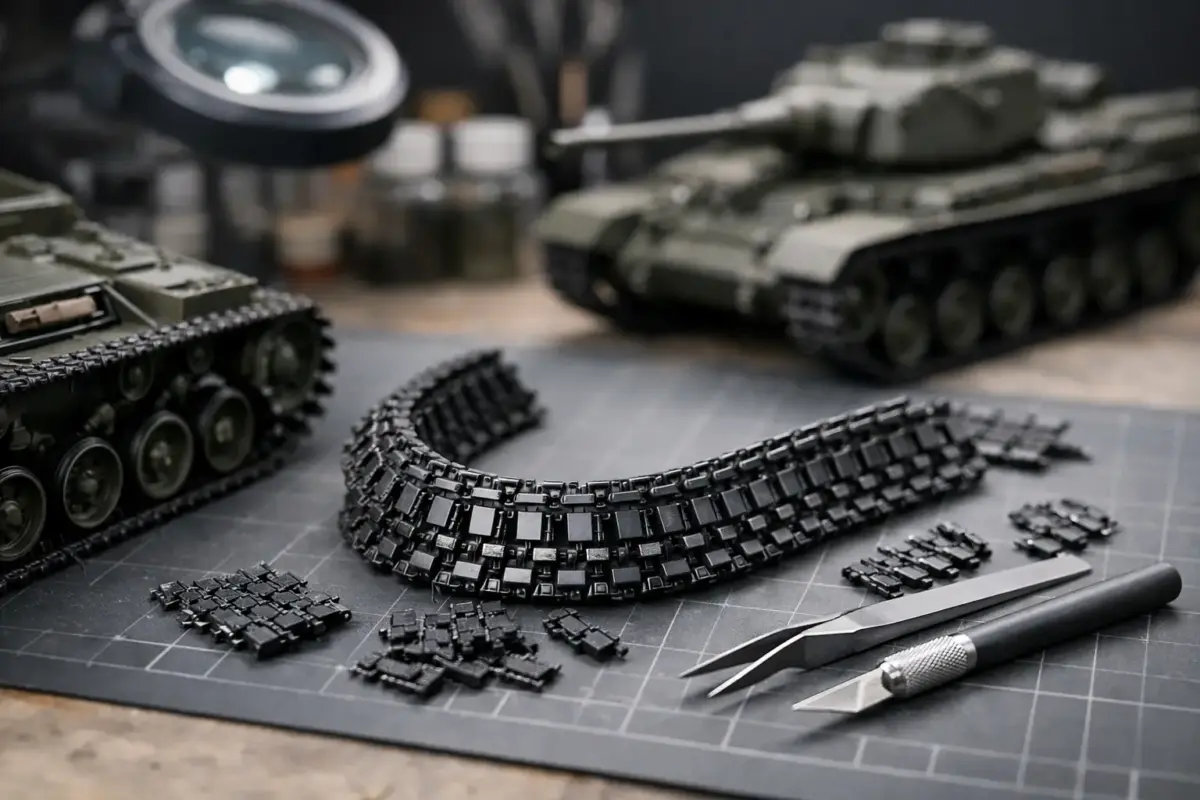
A convincing AFV can be let down by tracks that sit too tight, twist along the return run or show glue marks across the outer face. Learning how to build tank tracks is less about rushing through a repetitive task and more about choosing the right assembly method for the track type in your kit. Get the run, tension and finish right, and the tracks will give the whole model its weight and character.
Start by identifying your track type
Not all kit tracks behave the same way, so inspect the instructions and parts before removing anything from the sprue. The assembly approach for one-piece vinyl tracks is very different from the approach needed for individual links or workable aftermarket sets.
Rubber-band tracks are supplied as a continuous flexible loop. They are quick to fit and can look effective on vehicles with relatively taut tracks, but they need careful joining and often benefit from extra work to create natural sag. Link-and-length tracks combine straight runs with moulded curves around the drive sprocket and idler. They offer a good balance between detail and build time, provided the long sections are aligned accurately.
Individual-link tracks deliver the greatest control over detail, sag and damaged or replaced links. They may be supplied as separate links, as links joined by tiny sprue gates, or as workable assemblies with pins. These reward patience, but they are not automatically the best choice. On a 1:72 or 1:76 vehicle, well-fitted link-and-length tracks can look just as convincing as a complex aftermarket set.
Check the real vehicle too. Some suspension systems held their upper run quite taut, while others showed an obvious drape between return rollers. A dramatic sag may look impressive, but it is only correct where the vehicle design and track tension support it.
Tools and preparation that save time later
A sharp sprue cutter, fresh scalpel blade, sanding stick and fine tweezers cover most track work. A small steel rule or flat glass tile is useful for keeping long runs straight. For individual links, a shallow parts tray prevents small pieces from disappearing across the bench.
Remove mould seams and ejector-pin marks before assembly, especially where they appear on the guide teeth or outer track pads. This is repetitive work, but it is much easier at this stage than once the track has been wrapped around the running gear. Test-fit the drive sprocket against several links as well. A sprocket that does not mesh cleanly can force the whole run out of alignment.
Choose adhesive according to the material. Standard plastic cement is ideal for styrene link-and-length or individual-link tracks because it gives a short working time for adjustment. A slower-setting cement is particularly useful for forming sag. Vinyl tracks may need cyanoacrylate, a heated metal pin, or the specific method recommended by the kit manufacturer. Always test any adhesive on an offcut or hidden area first, as some flexible plastics resist conventional glues.
How to build tank tracks with the right sequence
The most reliable approach is to build the running gear first, but do not permanently attach every wheel until you understand how the tracks will sit. Keep the drive sprockets and idlers removable where possible. This makes painting easier and allows minor adjustment when fitting the finished runs.
Build the lower run on a flat surface
For link-and-length tracks, begin with the bottom run. Lay the links or moulded section against a straight edge and use the road wheels as a spacing reference. The lower run is often straight, although the weight of a vehicle can create subtle changes where it meets the wheels. Keep the guide teeth centred between the paired road wheels if the vehicle uses this arrangement.
With individual links, make a run slightly longer than the instructions suggest and test it against the suspension before the glue fully cures. Do not assume the stated number of links is infallible. Slight variation in wheel placement, paint thickness or kit tolerances can affect the fit.
Add the sprocket and idler curves
The curves around the drive sprocket and idler are where most alignment problems begin. Assemble these sections directly on the wheels where practical, using a small amount of cement at each connection. Let the plastic soften only enough to conform to the teeth and curve. Too much adhesive will erase the sharp definition that makes individual links worthwhile.
On vehicles with separate track pads or pronounced guide horns, check that every link faces the right direction. Reversed links are surprisingly easy to miss until the tracks are painted. Compare the pattern to the box artwork cautiously, but use the kit instructions and reference images as the final guide.
Form the upper run and sag
The upper run should be added while the lower run and curves are still adjustable. For a taut track, align it cleanly over the return rollers and let it set. For sag, wait until the cement is tacky, then press the run gently down between the rollers with a soft brush handle, cocktail stick or suitably sized spacer.
Aim for shallow, even dips rather than a series of sharp angles. Track links have considerable weight, but they do not hang like chain. On a vehicle without return rollers, the upper run may rest directly on the road wheels and show a different pattern of sag. Study the suspension layout before committing.
Once the track has set, remove it as a complete run only if the design allows. Painting tracks separately is convenient, but forcing a rigid finished assembly off the wheels risks breakage. Many builders instead paint the tracks in place and protect the surrounding hull and wheels with careful brushwork.
Common problems and practical fixes
A short run often means the idler is positioned too far forward, or a link has been omitted near a curve. If the kit permits it, move the idler slightly before adding a visibly incorrect stretched section. A run that is too long can sometimes be corrected by removing one link, but first check whether the real vehicle had an adjustable idler and whether the kit represents it.
If the upper run has lifted away from a return roller, apply a tiny amount of cement or thick cyanoacrylate beneath the contact point and hold it with a spacer until cured. Avoid flooding the area. Glue shine between links is difficult to hide, even under mud.
Vinyl tracks that refuse to hold a natural shape can be secured at discreet contact points on the tops of the road wheels. Forcing them into deep sag with pins or staples usually creates an artificial result. If the supplied tracks are heavily simplified or the join cannot be concealed, replacement plastic, resin or metal tracks may be worthwhile, particularly on a large-scale showpiece build.
Painting and weathering model tank tracks
Tracks are not simply black. Fresh steel, oxidised metal, dry dust, wet earth and polished contact surfaces can all appear on the same run. Start with a dark brown, dark grey or track-coloured base coat rather than pure black. The exact shade depends on the vehicle, period and environment, but a varied foundation looks more convincing than a single flat colour.
After the base coat, pick out the raised contact areas with a restrained metallic tone. The outer faces of track pads, guide teeth and inner surfaces that meet the wheels can wear to bare metal, but they should not look like bright chrome. Graphite powder, a soft pencil or a carefully dry-brushed dark steel shade works well for this stage.
Add dust, earth and mud after the tracks are fitted, so their finish relates naturally to the lower hull and running gear. Dry pigment tones suit dusty vehicles; textured pastes and earth-coloured acrylics work better for heavier mud. Build deposits gradually around the idler, sprocket and lower run, then leave some metal visible on the areas that would be scoured by movement.
Remember scale. Thick, wet-looking mud may suit a 1:35 vehicle in a winter diorama, but the same texture can overwhelm a 1:72 kit. A fine pigment wash is often enough at smaller scales. Match the track weathering to the groundwork too: pale road dust beneath a vehicle parked in dark woodland soil will always look disconnected.
For builders assembling an armour project from kit to final groundwork, Scale Model Shop stocks the specialist tools, track finishes, paints and weathering materials needed to keep each stage compatible.
A well-built track run should look as though it belongs to the vehicle rather than simply wraps around it. Take time to test the fit before glue sets, follow the real suspension rather than a generic sag pattern, and let the final weathering tell the same story as the hull and base.
