
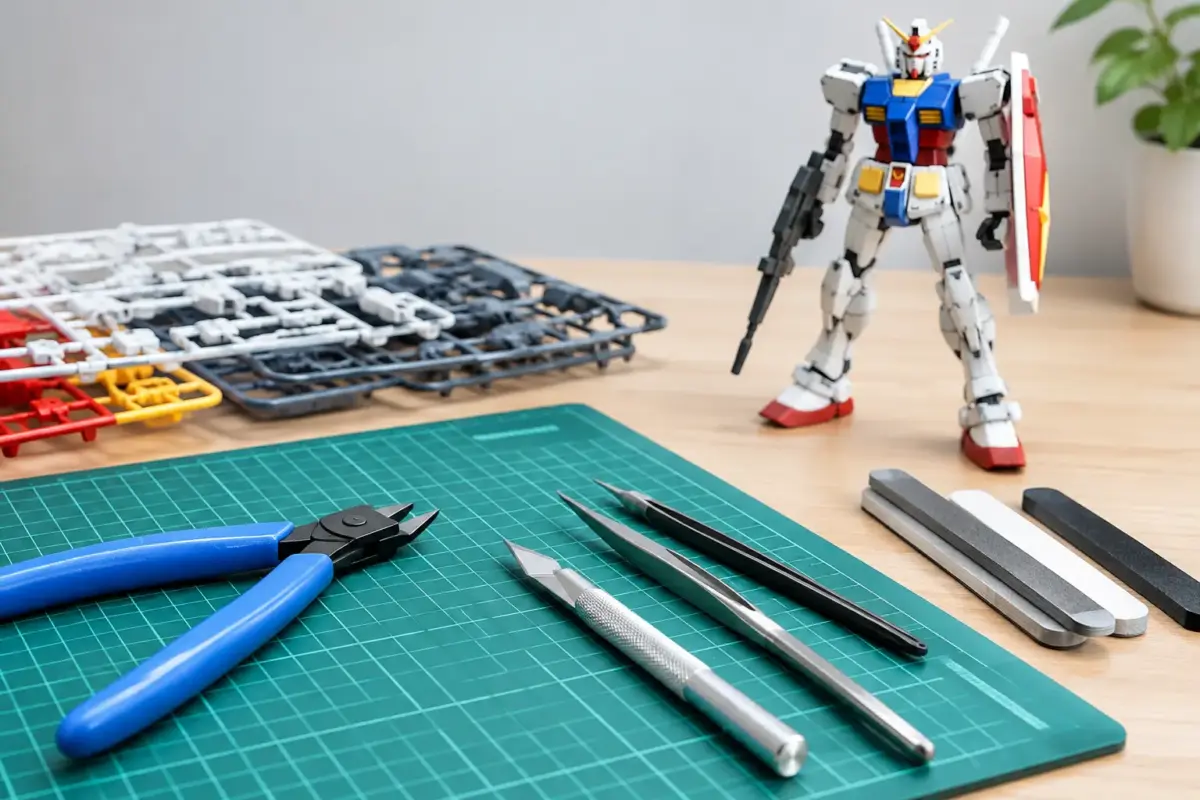
A clean Gunpla build rarely comes down to the kit alone. The difference between visible stress marks, rough gates and a crisp display finish is usually found in the workbench routine. The right Gundam tools let you remove parts cleanly, refine surfaces with control and add detail without damaging the plastic underneath.
For a first High Grade kit, a handful of well-chosen essentials will take you a long way. For Master Grade, Real Grade and Perfect Grade projects, the same fundamentals still apply, but precision, organisation and surface preparation become increasingly valuable. Build the tool selection around the stage you are working on rather than buying every specialist item at once.
Start with the essential Gundam tools
A practical starter set should cover cutting, cleanup, assembly and basic marking. Quality matters more than quantity here: one sharp pair of nippers and a dependable hobby knife will serve far better than a large set of poorly made tools.
The core bench kit comprises:
- single-blade or fine side cutters for removing parts from the runner
- a self-healing cutting mat to protect both your worktop and knife blades
- a hobby knife with fresh replacement blades for trimming remaining gate material
- sanding sticks, files or abrasive sponges in a range of grits
- fine tweezers for stickers, photo-etched details and small parts
- a panel line pen or liner for bringing recessed detail to life
A parts tray is also useful, especially for Real Grade frames and smaller accessory parts. It is not glamorous, but it stops tiny pieces rolling off the bench at the moment they are most difficult to replace.
Nippers: the tool that affects every part
Nippers are the most-used tool in most Gunpla projects, and they are worth choosing carefully. Standard side cutters are excellent for the first cut, removing a part from the runner while leaving a short length of gate behind. Do not try to cut flush against the part with general-purpose cutters. The pressure can pinch the plastic and leave whitening or a small gouge.
For the final cut, single-blade nippers are designed to slice rather than crush. Used correctly, they can leave very little to clean up on Bandai’s softer plastics. They are especially helpful on white, red, blue and dark glossy parts, where a stressed nub mark is easy to spot.
That said, fine nippers are not indestructible. Avoid using them on clear parts, thick runner sections, metal pins or unusually hard plastic. Use a stronger pair for the initial runner cut and reserve the finer tool for close work. This two-stage approach costs a little more at the outset but protects the precision cutters and produces more consistent results.
Clean nub marks without losing surface detail
Even the best cut normally leaves a trace of gate material. The aim is to remove it gradually until it is level with the surrounding plastic, not to rush through it and create a flat spot.
Begin by trimming the remaining nub with a sharp hobby knife, taking thin shavings away from the surface. Hold the blade at a shallow angle and work in controlled passes. A blunt blade encourages force, which is when slips and unwanted cuts happen. Replacing blades regularly is one of the simplest ways to improve both safety and finish quality.
Follow with sanding if needed. Abrasive sponges are useful on curved armour panels because they conform to the shape, while rigid sanding sticks work well around sharper edges and flat surfaces. Start with a moderate grit to remove the last of the nub, then move through finer grades to reduce scratches. The exact grit sequence depends on the plastic and final finish, but skipping straight to a very fine abrasive will make the job slower rather than cleaner.
On glossy armour, sanding may leave a dull patch even after the nub has gone. Polishing pads can restore some sheen, while a suitable gloss top coat can unify the finish later. If the kit is to be painted, the surface can be prepared more evenly with fine abrasive before primer.
Choosing tools for straight builds, detailing and paint
A straight build means assembling the kit with its supplied colours, perhaps adding stickers, decals and panel lines. It remains one of the most satisfying ways to enjoy Gunpla, and it does not demand an airbrush or a large paint station. Careful cutting, cleanup and panel lining will make a larger difference than buying advanced finishing products before you are ready to use them.
Panel lining adds depth to vents, armour separations and mechanical areas. Fine-tipped panel line pens are convenient and controlled, particularly for beginners. Pour-type liners flow readily through recessed detail, but they require care around assembled joints, stressed plastic and ABS components. Apply them sparingly to individual parts where possible, allow them to dry, then clean excess with the appropriate thinner or a cotton bud. Always test an unfamiliar product on spare runner plastic first.
For builders moving into painting, the tool list expands according to the chosen method. Brush painting benefits from a good selection of small synthetic brushes, a palette, paint stirrers and proper thinning supplies. Airbrushing calls for an airbrush, compressor, cleaning equipment, masks and a well-ventilated spray area. It offers excellent control over large armour panels and subtle shading, but it also brings a greater cleaning and setup commitment.
A top coat is often the bridge between a tidy straight build and a more finished display model. Gloss finishes suit polished or factory-fresh mobile suits, satin gives a restrained sheen, and matt reduces the toy-like appearance of bare plastic. A gloss coat also provides a helpful surface for decals and washes, while a final matt or satin coat can blend markings into the overall finish.
Decals, stickers and small-detail work
Bandai kits may include foil stickers, marking stickers, dry transfers or waterslide decals depending on the grade and release. Each calls for slightly different handling. Tweezers help position small markings, but soft-tipped tweezers or a damp brush reduce the chance of scratching a decal or dropping it onto an exposed surface.
Waterslide decals reward patience. Cut close to the design, soak briefly, then slide the decal into place with a brush. Blot away excess water and let it settle before using decal-setting solutions. A gloss surface reduces the risk of silvering, where trapped air leaves a pale edge beneath the carrier film. Once fully dry, seal decals with a compatible clear coat.
For photo-etched parts and aftermarket metal details, add a fine file, bending pliers and a suitable adhesive to the bench. These upgrades can transform vents, sensors and mechanical surfaces, but they are not essential on every build. A well-cleaned, carefully assembled kit is more convincing than one overloaded with detail parts that are poorly fitted.
Set up a bench that supports careful work
Good Gundam modelling is easier when the bench is organised for the task. Keep cutters, knife, abrasives and tweezers within easy reach, but place paint, thinners and adhesives away from the immediate assembly area. Strong lighting is vital for checking nub marks and panel lines. A daylight lamp or adjustable task light will reveal flaws that room lighting can hide.
If you are using sprays, airbrush paints, cement or stronger thinners, ventilation and personal protection are part of the toolkit. Follow the product guidance, use suitable respiratory protection where required and avoid spraying in a shared living space. Allow painted parts to cure somewhere dust-free before handling them.
It also helps to read ahead in the instructions. Check which pieces need to be painted before assembly, which joints should remain free of paint, and where decals are intended to sit. On complex kits, clipping parts only as they are needed reduces confusion and keeps similar-looking pieces from becoming mixed up.
Buy for the build you want to make
There is no single perfect collection of Gundam tools. A builder focused on High Grade straight builds may need excellent nippers, a knife, abrasives and panel liners. Someone planning custom colours, weathering or resin conversions will need a wider range of paints, adhesives and finishing equipment.
Choose reliable tools that match your current project, then add specialist items when they solve a real problem at the bench. Scale Model Shop can help modellers source the practical essentials alongside paints, decals, weathering materials and display-finish supplies, without treating Gunpla as an afterthought.
The most rewarding upgrade is often not a more complicated technique, but the habit of slowing down for the final cut, the last sanding pass and the careful alignment of each part. Those small decisions are what make a finished mobile suit look properly built rather than merely assembled.
