
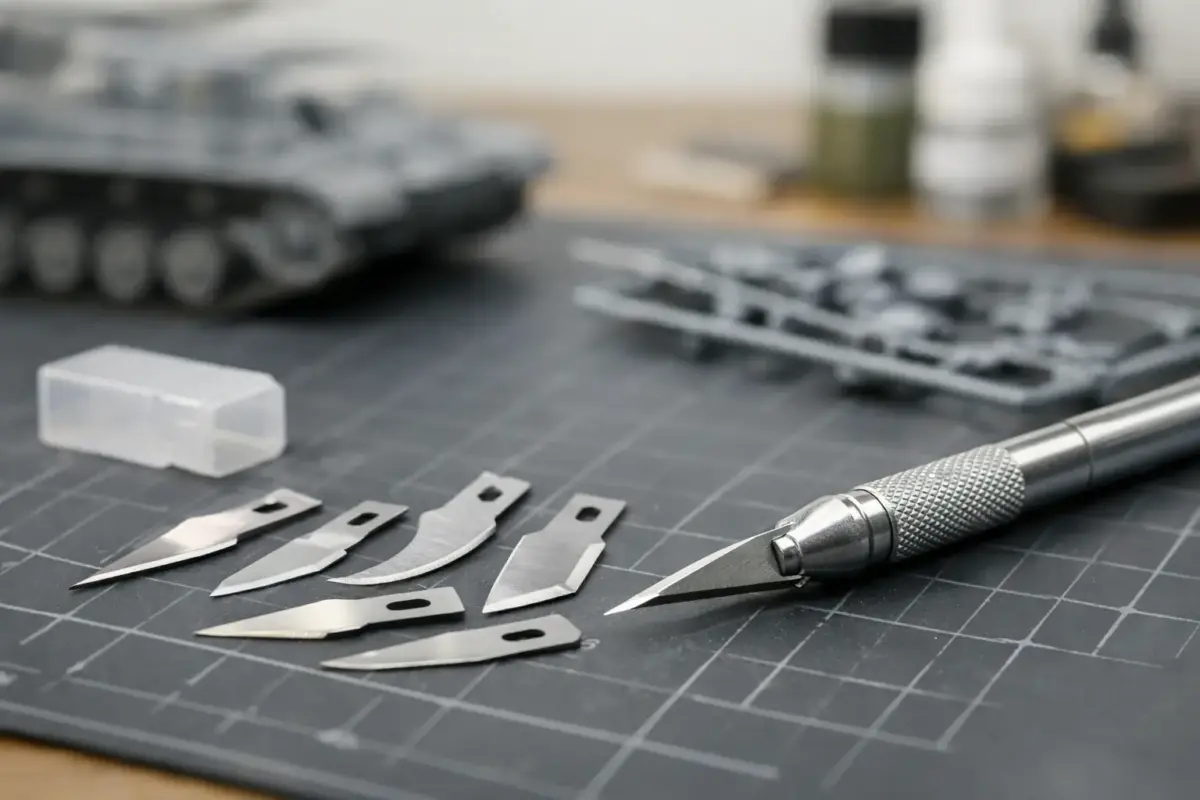
A fresh blade can be the difference between a crisp canopy frame and a stress mark that spoils the clear part. The best hobby knife blades are not simply the sharpest available. They are the right profile, thickness and fitting for the material in front of you, whether you are removing tiny resin parts, trimming decal film or cutting dense plastic card for a diorama.
For most scale modellers, a small selection of blades is more useful than relying on one pattern for every job. A fine pointed blade remains the bench essential, but curved, chisel and heavy-duty blades all earn their place once a build moves beyond basic sprue removal.
What makes the best hobby knife blades?
Blade choice starts with control. A blade must cut with minimal pressure, track predictably along a marked line and remain stable in a compatible handle. Sharpness matters, but so does blade geometry. A thin pointed blade gets into tight corners, while a broader blade offers a straighter, more supported cut through sheet material.
The material also changes the answer. Standard injection-moulded polystyrene is forgiving, whereas resin is brittle and can chip if forced. Photo-etched brass needs a firm cutting surface and a blade that does not flex. Clear parts benefit from light scoring rather than a deep, forceful slice. There is no single blade that performs perfectly across all four.
Steel quality affects how long an edge stays clean, especially when working with plastic card, filler, masking material or paper templates. Stainless blades are commonly chosen for their corrosion resistance, while carbon-steel blades can offer a very keen edge but should be kept dry. In practical bench use, replacement frequency usually matters more than trying to make one blade last indefinitely.
A dull blade is not economical. It requires extra pressure, wanders from a scribed line and leaves a rough edge that takes longer to clean up. For delicate work, changing the blade early is often the safer and more accurate option.
Blade profiles every modeller should know
Fine pointed blades
The familiar pointed hobby blade, often referred to as a No. 11 pattern blade, is the default choice for most kit work. Its narrow tip is excellent for opening panel lines, trimming small gates, cutting masks, removing mould seams in confined areas and carefully separating parts from a sprue after the main cut has been made with nippers.
Its limitation is fragility. The point can snap when twisted or used to prise parts apart, and the narrow shape is not ideal for long cuts through thick plastic card. Use the tip to score or pare away material, not as a miniature lever.
Curved and general-purpose blades
A curved blade gives a flowing cutting edge rather than concentrating the work at a single point. It is useful for trimming vacform parts, cutting masking tape, shaping soft putty and making controlled cuts through thin sheet. The curve can be rolled gently through the material, which is often smoother than dragging a pointed blade sideways.
For figure modellers, this profile can also help when refining clothing edges or removing a thin ridge of cured filler from a rounded surface. Work in shallow passes and away from the detail rather than trying to remove all the material at once.
Chisel blades
Chisel blades have a square, flat cutting edge. They are particularly useful for scraping raised mould lines, shaving sprue gates flush with a flat surface, cleaning corners and removing small amounts of plastic without gouging the surrounding area. On armour kits, they are valuable around fenders, tools and other areas where a pointed blade may dig in.
Use the edge with a light pulling motion. A chisel blade can remove material very quickly, so practise the movement on a spare section of sprue before approaching a highly visible fuselage or vehicle hull.
Heavy-duty and snap-off blades
For thick plastic card, foamboard, cork, dense scenic materials and repeated straight cuts, a larger utility or snap-off blade is the sensible tool. It offers greater rigidity and a handle designed for more pressure. Trying to force a delicate craft blade through these materials risks breaking the tip and can leave an uneven cut.
This is especially relevant for railway layouts and diorama bases. Score against a steel rule in several light passes, then make the final cut once the groove is established. A fresh segment on a snap-off blade is better than forcing a tired edge through one more sheet.
Match the blade to the handle
Compatibility is essential. Hobby blade numbers, surgical scalpel fittings and proprietary craft-knife systems are not automatically interchangeable. A blade may appear to fit a handle but still sit loosely, fail to clamp evenly or work free under pressure.
Choose replacement blades designed for the fitting used by your handle. Common craft-knife handles use a slotted collet that accepts standard hobby blades, while surgical-style blades fit numbered scalpel handles. Larger blades require a suitably sized handle. If you use several systems at the bench, keep each blade type in its labelled pack rather than mixing loose blades in a drawer.
The handle itself affects precision. A slim, knurled metal handle is excellent for fine work because it allows a pencil-like grip. A larger rubberised or aluminium handle can be more comfortable for long scoring sessions. Neither is universally better; the right choice depends on the task and how much control you need.
Choosing blades for common modelling jobs
Plastic kit assembly
For normal plastic kit assembly, use sprue cutters for the initial separation and reserve a pointed blade for tidying the remaining gate. This reduces strain on the blade and avoids tearing the part.
On clear parts, score lightly along the attachment point and support the piece close to the cut. A coarse cut followed by careful sanding is safer than trying to trim right up against a canopy in one pass.
Resin parts and casting blocks
Resin parts deserve a different approach. Wash them first to remove mould-release residue, then use a fine saw or heavy blade for substantial casting blocks. A hobby knife is best reserved for final clean-up.
A dedicated tool such as the Special Hobby Razor Saw Profi Set H1020 gives you a practical option for controlled cuts through resin blocks and delicate styrene parts. Resin dust should be controlled with wet sanding where appropriate, and a dust mask is sensible when sawing or sanding larger pieces.
Photo-etched details
Photo-etched details should be cut on a hard, smooth surface such as glass, ceramic tile or a purpose-made cutting plate. Place the blade at the attachment tag and press or rock it through with control.
Do not cut photo-etch on a self-healing mat if the part can bend into the surface, and never use your fingers to hold a tiny part in the path of the blade.
Masking tape and decals
When cutting masking tape for camouflage, a fresh pointed blade creates a clean edge that helps prevent paint creep. For repeated shapes, such as RAF roundel masks or vehicle recognition markings, replace the blade sooner than you might for ordinary trimming. The small amount of adhesive picked up from tape can quickly reduce cutting quality.
A sharp pointed blade is also useful for trimming excess decal film. Work on a suitable cutting surface before the decal is applied, using light pressure to avoid tearing the printed design.
Why fresh blades improve the finish
Many apparent paint and assembly problems begin with a poor cut. A ragged sprue gate can leave a raised scar that only becomes visible after primer. A blade dragged through clear plastic can create a cloudy stress line. An uneven cut in a mask can make an otherwise careful paint finish look soft or irregular.
Replacing the blade protects the model as well as your patience. Keep a small supply close to the work area so you do not postpone the change. Use a safe sharps container or clearly marked rigid pot for used blades. Never leave them loose on the cutting mat, in a paint-jar lid or amongst sanding sticks.
There is also a safety benefit. Sharp blades cut with less force. Always cut away from your body, keep the supporting hand clear of the path and rotate the model rather than making an awkward cut towards your fingers. A non-slip cutting mat, good task lighting and a stable bench make careful work much easier.
A practical blade setup for the modelling bench
Most builders can cover the majority of projects with a standard pointed-blade handle, a stock of replacement pointed blades, one curved or general-purpose blade, a chisel blade and a larger knife for scenic materials. Add a fine razor saw for resin blocks and delicate styrene parts rather than expecting one knife blade to perform every cutting job.
For a broader selection in one package, the Rolson 36 Piece Hobby Knife Set 62926 provides a convenient way to equip the workbench for varied cutting and shaping tasks.
Choosing blades alongside your cutters, sanding tools, masking products and plastic card helps keep the preparation stage organised. It also makes it easier to keep suitable replacements ready before the blade in your handle reaches the end of its useful life.
The best approach is simple: let the material and the cut determine the blade. A clean, controlled cut at the start of the build leaves more time for the detail, paintwork and finishing touches that make a model worth displaying.
