
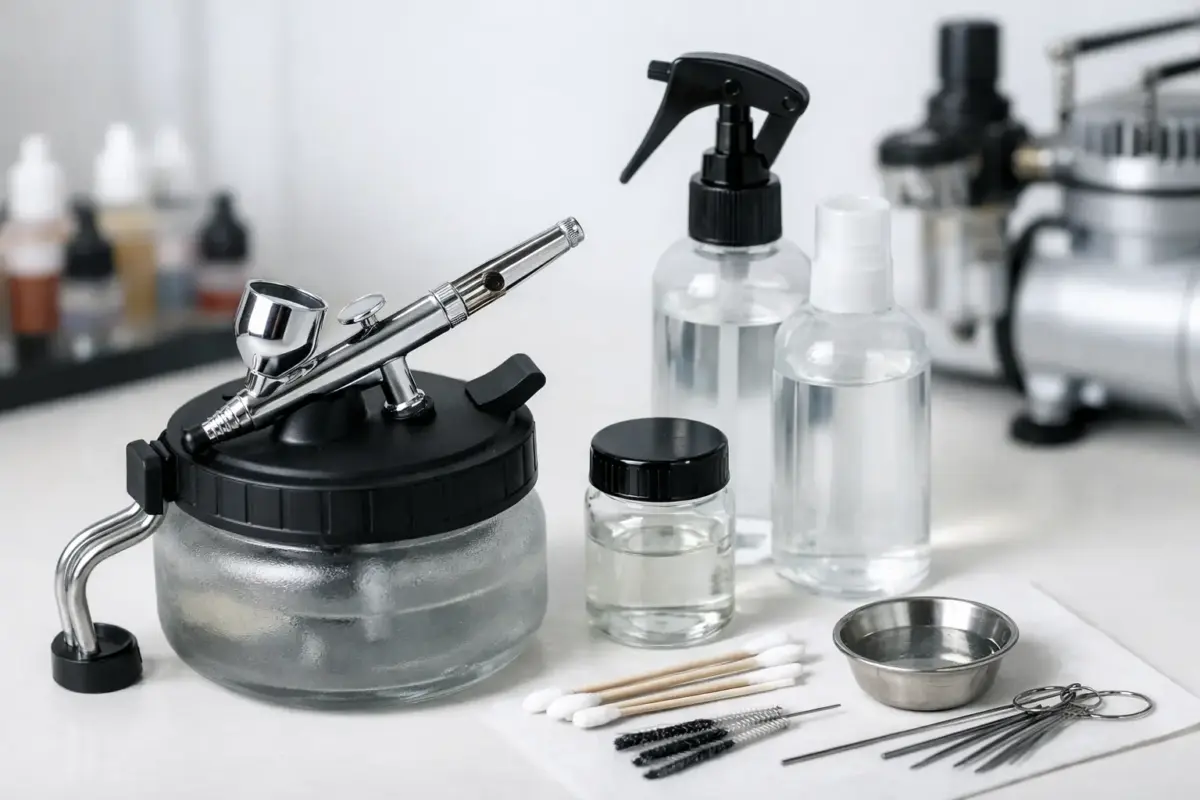
A paint cup that looks empty is not necessarily clean. Acrylic residue settles around the nozzle, needle tip and air cap, where a thin film can quickly become a cause of sputtering, poor atomisation and a frustratingly uneven finish. For most scale modellers, the best airbrush cleaner for acrylics is a dedicated, hobby-grade cleaner used promptly after every colour session – not a stronger household solvent used only once the airbrush is already blocked.
The right choice still depends on the paint range in use, how long the paint has been allowed to dry, and whether you are flushing between colours or carrying out a proper strip-down. A reliable cleaning routine matters just as much as the bottle on the bench.
Why acrylic airbrush paint needs the right cleaner
Water-based acrylics are popular for good reason. They dry quickly, offer a broad choice of military, aircraft, figure and wargaming colours, and are generally more pleasant to use indoors than solvent-heavy systems. That quick drying time, however, is exactly why acrylic paint can collect inside an airbrush.
Acrylic binder begins to dry as water and other carriers evaporate. The exposed paint around the needle and nozzle can start to cure while you are still working, particularly when spraying fine mottling, tight camouflage demarcations or low-pressure figure shading. Plain water may shift wet paint, but it does not always break down that partly dried binder effectively.
A purpose-made airbrush cleaner is formulated to loosen acrylic residue while remaining suitable for normal airbrush materials. It gives far more dependable results than treating every paint range as though it reacts in the same way. This is particularly valuable when you have invested in a quality double-action airbrush with a fine nozzle.
The best airbrush cleaner for acrylics: the practical answer
For routine cleaning, choose a dedicated acrylic airbrush cleaner from a recognised hobby paint manufacturer. Vallejo Airbrush Cleaner is a well-established general choice for water-based acrylics and is useful for flushing the airbrush, cleaning the cup and wiping the needle during a session. AK Interactive and AMMO also offer purpose-made cleaners designed for their acrylic paint systems, making them sensible choices if those are the paints you use most often.
Matching the cleaner to the paint brand is not compulsory, but it is often the least troublesome route. Manufacturers formulate paints, thinners, flow improvers and cleaners to work as a system. If you regularly spray Vallejo Model Air or Model Colour, a Vallejo cleaner is an easy default. If your bench is largely AK 3rd Generation or AMMO acrylics, their corresponding cleaners are a logical first option.
That said, many dedicated acrylic cleaners work perfectly well across brands. A modeller who uses several ranges does not need a separate bottle for every paint line. The better approach is to keep one dependable cleaner for normal flushing, then check compatibility before using any more aggressive product on a stubborn blockage.
Dedicated cleaner, water or stronger solvent?
Each option has a place, but they are not interchangeable.
Water for the first rinse
Clean water is useful as an initial rinse when paint is still wet. It removes the bulk of the remaining colour from the cup and reduces how much dedicated cleaner you use. Distilled or deionised water is preferable where possible, as it avoids mineral deposits in areas with hard water.
Water alone is rarely enough for a final clean. It can leave diluted pigment and binder behind in the nozzle, especially after a long spraying session. Use it as the economical first stage, rather than the whole process.
Dedicated cleaner for everyday maintenance
Acrylic airbrush cleaner is the working solution for most hobby benches. It is designed to flush pigment from internal passages, soften fresh acrylic deposits and leave the airbrush ready for the next colour. It is also useful on a cotton bud or lint-free cloth for cleaning the paint cup and exposed needle.
Its main advantage is balance. It is effective without making aggressive solvents your default, and it is much more predictable than improvised household mixtures. For regular scale modelling use, this is where most of your cleaning budget should go.
Isopropyl alcohol and specialist cleaners for dried deposits
Isopropyl alcohol can help remove some acrylic residue, but it is not a universal answer. It may cause certain acrylic paints to coagulate into a gummy mess rather than dissolve cleanly, and repeated exposure can dry rubber seals on older or budget airbrushes. Do not assume that a product which works well on one paint range will suit another.
For a properly dried blockage, a specialist airbrush cleaning solution or cleaner intended for stubborn acrylic deposits is usually the better choice. Remove the needle and nozzle where appropriate, soak only the parts the product instructions permit, then clean gently with the correct brushes. Never force a blockage through a fine nozzle with wire, drill bits or excessive pressure.
A cleaning routine that prevents clogs
The most effective cleaner cannot compensate for leaving paint in the airbrush until the next evening. Clean as soon as a colour is finished, and perform a more thorough clean at the end of the session.
Between colours, empty excess paint back into its bottle only if it is uncontaminated. Wipe the cup, add water or cleaner, then spray through into a suitable cleaning pot. Repeat until the fluid runs clear, followed by a final flush with dedicated cleaner. Pull the needle back slightly only when necessary, as drawing it fully rearwards through a paint-filled body can carry residue into the trigger area.
At the end of a session, remove the needle carefully and wipe it from the rear towards the pointed tip with cleaner on a soft cloth. This direction protects the tip from bending. Clean the nozzle and air cap with a small, soft brush or cleaning tool made for airbrushes. Reassemble without overtightening the nozzle, especially on small self-centring designs.
If spray performance suddenly changes, do not immediately dismantle every component. First inspect the needle tip for dried paint, check the nozzle for a visible plug, and confirm that the paint was thinned correctly. Many apparent cleaner problems are really issues caused by paint that was too thick, pressure that was too low, or long pauses during spraying.
Cleaner is not thinner
This distinction saves a great deal of avoidable trouble. Airbrush thinner is formulated to improve paint flow, drying behaviour and atomisation. Cleaner is formulated to remove paint. Although some modellers use thinner for a quick flush, it is not always as effective or as economical as a dedicated cleaner for maintenance.
Likewise, do not use airbrush cleaner as a substitute for thinner in the paint cup unless the paint manufacturer specifically recommends it. Cleaner can alter the paint mix, adhesion or finish in ways that are not obvious until the model has dried. Keep separate bottles clearly labelled on the bench, particularly if you move between acrylic, lacquer and enamel paint systems.
What to avoid when cleaning acrylics
Avoid leaving the airbrush soaking overnight unless the manufacturer confirms that all seals and finishes can tolerate the product. A short, controlled soak of a removable nozzle may be appropriate, but soaking the complete airbrush can affect seals, lubricants and plated surfaces.
Household glass cleaner is another tempting shortcut. Formulas vary, and some contain ammonia, fragrances, dyes or additives with no place in a precision tool. It may appear to work, yet leave deposits or prove unsuitable for particular seals and paint types. A modelling cleaner costs more per bottle than a kitchen product, but it is a small expense compared with replacing a damaged nozzle or chasing recurring spray faults.
Finally, do not scrape the nozzle with anything hard. Fine nozzles are easily distorted, and even a tiny change to the opening can ruin the spray pattern. Soft nylon brushes, purpose-made cleaning reamers used carefully, and a clean needle are safer choices.
Choosing a cleaner for your modelling bench
If you mainly spray water-based acrylics, start with a dedicated cleaner in a practical bottle size and use it consistently. A larger bottle makes sense for regular aircraft or armour projects, where several camouflage colours and clear coats may pass through the airbrush in one sitting. A smaller bottle is useful for occasional builders or a portable painting setup.
Keep water for the first rinse, dedicated cleaner for every flush and wipe-down, and a stronger compatible cleaner only for the rare dried-paint rescue. This three-stage approach is economical, kind to the airbrush and easy to repeat.
Scale Model Shop stocks the paints, thinners, cleaning products and airbrush accessories needed to keep that routine simple, whether you are spraying a 1:72 cockpit, a 1:35 armour finish or a display-quality figure. A clean airbrush is not glamorous bench equipment, but it is one of the surest ways to make every carefully chosen colour perform as it should.
