
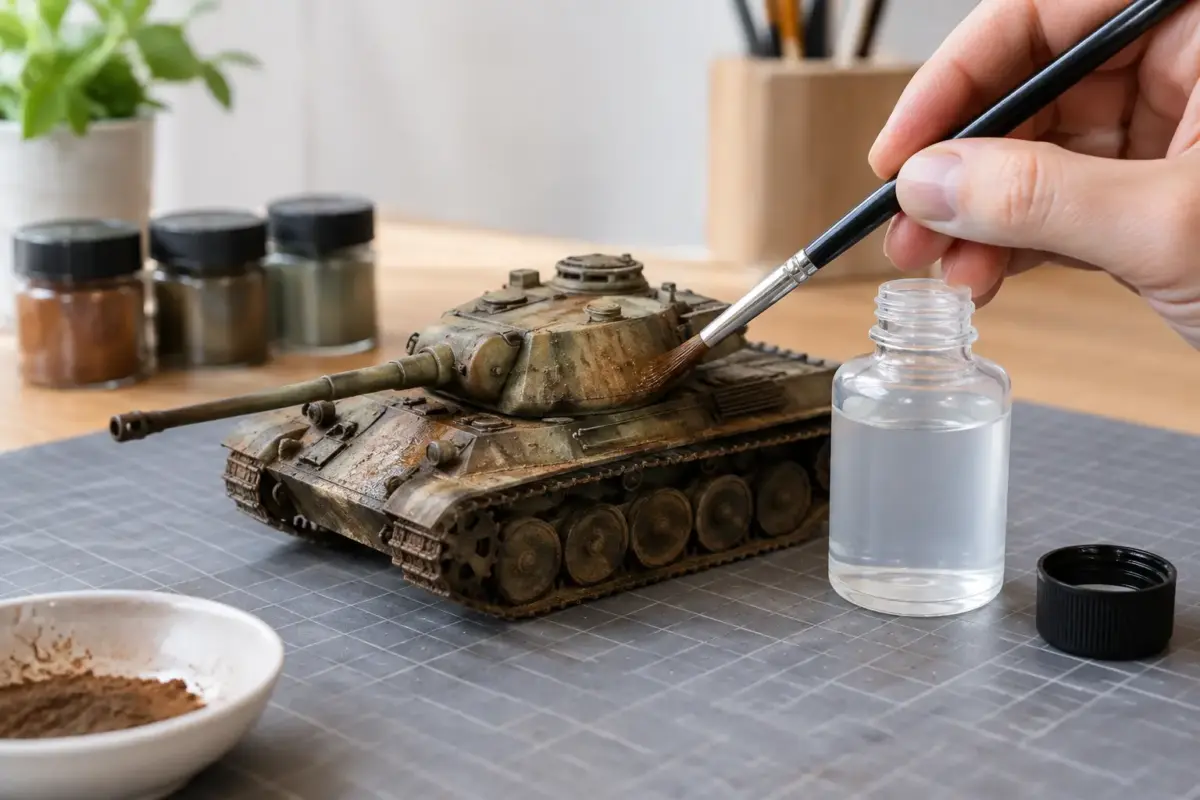
Loose pigment can make a model look convincingly dusty in seconds, but it can also disappear under handling, blow away during photography, or leave fingerprints on a carefully finished hull. Knowing how to use pigment fixer gives weathering powders the permanence they need without turning fine dust effects into dark, wet-looking stains.
Pigment fixer is a thin liquid designed to draw dry weathering pigment into the surface and bind it once dry. It is especially useful on running gear, lower hulls, aircraft tyres, exhaust areas, groundwork and figures, where a dry pigment finish needs to survive normal handling. Used with restraint, it keeps the soft, matte character that makes pigments so effective in the first place.
What pigment fixer does – and what it does not do
Weathering pigments are finely ground coloured powders. Applied dry, they sit on the surface much like real dust, dried soil or oxidised residue. That is ideal for subtle work, but it is fragile. A pigment fixer carries a binder into the powder by capillary action, anchoring it to the model after the carrier has evaporated.
Most dedicated pigment fixers are enamel or solvent based, although water-based alternatives are available. Their behaviour varies between brands, so treat the label instructions as the final word on compatible thinners, drying time and clean-up. A fixer is not simply a clear varnish. Varnish forms a more noticeable film over the pigment and can reduce its texture; fixer is formulated to soak through it.
The trade-off is that almost any fixer will deepen pigment colour while wet, and often slightly once dry. Pale dust can become more pronounced and a fluffy mud texture can settle down. This is normal, but it is why testing on a spare wheel, spoon or hidden area of the kit is worthwhile before committing to a finished model.
Prepare the model before fixing pigments
Apply decals, filters, washes and most paint chipping before pigments. Pigments generally belong towards the end of the finishing process because later wet products can disturb, dissolve or cover them. A matt or satin surface gives dry pigment more grip than a glossy one, although fixer will still work over a smooth painted finish.
Make sure the underlying paint is fully cured. This matters particularly when using a spirit-based fixer over acrylic paint, enamel washes or delicate decal work. A compatible protective varnish layer can provide reassurance, but allow that layer to cure fully too. Rushing this stage is how fingerprints, tide marks and softened paintwork appear.
Choose pigment shades as you would choose real terrain. Vehicles operating on chalky ground rarely carry rich red earth on every surface, while a coastal aircraft may show grey-brown grime rather than desert dust. Mixing two or three close shades usually looks more natural than relying on one colour everywhere. Keep the lightest tones for fresh, dry dust and reserve darker browns for damp soil, shadowed recesses and accumulated mud.
How to use pigment fixer: the controlled method
For most armour, aircraft and vehicle models, apply the pigment first and fix it afterwards. Use a soft, worn brush to work a small amount of dry pigment into recesses, around bolt heads, across tyre sidewalls or along the lower edge of a hull. Build colour gradually. The model should look a little lighter and dustier than the intended final effect, as fixing will reduce some of that airy finish.
Load a fine brush with pigment fixer, then touch it to the edge of the pigmented area. Do not brush it back and forth. The liquid should wick through the powder on its own. This gives far greater control than flooding the surface, particularly around raised detail, panel lines and textured cast armour.
Work in small sections and let each section settle. On tracks, for example, fix the inner faces and recesses first, then move to the outer pads and guide teeth. On aircraft wheels, keep the application concentrated around the tread and lower sidewall instead of creating an even brown ring around the entire tyre. Real dirt collects according to contact, airflow, gravity and moisture.
When the fixer has dried, assess the effect under normal room lighting rather than only beneath a workbench lamp. If it has become too dark, soften it with a fresh application of a lighter dry pigment. If it remains too loose, repeat the fixing process with a smaller amount of liquid. Several light passes are safer than one heavy application.
Avoid flooding the surface
The most common mistake is using too much fixer. A flooded area can create dark pools, hard edges and an almost glossy patch that does not resemble dust or dried earth. It may also carry pigment into panel lines where it was not wanted.
If this happens while the fixer is still wet, touch the excess with the tip of a clean, dry brush or a corner of absorbent paper held close to the surface. Do not press or wipe, as this can lift the pigment and leave a bare patch. Once dry, it is often easier to disguise a tide mark with additional layers of pigment, mud texture or carefully placed streaking than to scrub the area back.
Using fixer for mud, rust and heavy deposits
Pigment fixer is not limited to dry dust. It can be mixed with pigment to make a paste for heavier soil deposits, exhaust staining and textured rust. Place a little pigment in a palette, add fixer a drop at a time, and stir until it reaches the consistency required.
A thin slurry is useful for damp earth in wheel arches or around track links. A thicker mixture can be stippled onto lower hulls with an old brush to suggest compacted mud. For greater texture, add fine sand, plaster-based groundwork material or purpose-made earth effects, but use these sparingly at smaller scales. What looks convincing on a 1:35 tank can appear oversized on a 1:72 aircraft or 28 mm wargaming vehicle.
For rust, avoid covering an entire exhaust or ship fitting in one orange-brown layer. Start with dark brown and near-black corrosion in deep areas, then add restrained reddish and orange tones to exposed edges. Fix each layer selectively. This retains depth and prevents the finish from looking like a single painted colour.
Choosing the right applicators and surfaces
A soft round brush is the most useful tool for applying dry pigments. Keep one brush for pale dust and another for dark mud or soot, as powders linger in the bristles. A small flat brush is helpful for broad deposits on vehicle sides, while a stiff old brush is better for stippling thick pigment paste.
Cotton buds can remove excess pigment from raised areas, but use them gently. On figures and aircraft, a short-haired makeup brush can apply very soft dusting without leaving obvious brush marks. For track runs, an old brush cut down to a shorter bristle length gives useful control around links and between road wheels.
Pigment fixer performs especially well over textured surfaces such as anti-slip coatings, cast metal, groundwork and rough matte paint. Smooth gloss finishes offer less mechanical grip and make pooling more visible. If you are weathering a glossy racing vehicle, a polished aircraft finish or a clean sci-fi subject, use a minimal amount and confine pigments to believable dirt traps such as tyres, vents, landing gear and underside details.
Compatibility, drying and safe handling
Always check whether your fixer is enamel, lacquer, water based or another formulation. Do not assume that products from different paint systems can be mixed freely. If you have used enamel washes recently, a solvent-based fixer may reactivate or shift them. In that situation, allow more curing time, test first, or use a compatible water-based product.
Leave fixed pigments undisturbed until fully dry. The surface may feel dry relatively quickly, but deeper deposits and pigment pastes need longer. Avoid applying a final varnish unless the particular model will receive frequent handling. Varnish can alter the tone and texture of pigment work, especially pale dust. For gaming miniatures, a carefully misted protective coat may be a sensible durability compromise; for a display model, selective fixing is often the better choice.
Use solvent-based products with good ventilation and keep them away from flames. Close pigment pots promptly, as the fine powder travels farther across a workbench than expected. A clean brush, a covered palette and a dedicated weathering area make the process more predictable.
A finish that still looks like real dust
The best pigment work is rarely uniform. Let the upper surfaces remain lighter, concentrate heavier deposits around suspension and recesses, and leave a few cleaner areas where rain, crew activity or airflow would have removed dirt. Fixer should support that variation, not flatten it.
If you are unsure, practise on a spare kit part before weathering the main model. A small test will show how your chosen pigment, paint finish and fixer behave together, and it gives you the confidence to build those final layers with purpose rather than caution.
