A good Gundam build can look flat right up until the panel lines go on. Then the moulded detail starts to read properly, armour breaks into separate surfaces, and even a simple High Grade kit gains depth. That is why a solid gunpla panel lining guide matters – it is one of the quickest ways to improve a build without moving straight into full custom painting.
Panel lining is straightforward in principle. You place a darker colour into recessed lines and around surface detail so the parts look more defined. In practice, the result depends on your kit, your finish, and the products you choose. The right method for a straight-build Entry Grade is not always the right one for a gloss-coated Master Grade with waterslide decals planned afterwards.
What this gunpla panel lining guide covers
For most builders, there are three realistic routes. You can use a fine-tip panel lining pen, a pour-type marker, or an enamel-based panel line wash. All three can work well, but they suit different surfaces and different levels of experience.
A fine-tip marker is the most forgiving place to start. It behaves much like a technical pen and gives you direct control over where the line goes. If you are building on bare plastic and want to keep the process simple, this is usually the safest option. The trade-off is speed. On a heavily detailed kit, hand-drawing every line takes time, and the finish can look slightly less crisp than a wash that flows neatly through a recessed channel.
A pour-type marker sits in the middle. It uses capillary action to run through engraved lines with less effort than a conventional pen. On suitable plastic it is quick, tidy and very beginner-friendly. The catch is compatibility. Some plastics are more sensitive than others, particularly ABS used for certain inner frame or joint parts. If you are unsure, test first on a hidden area or on a spare runner.
Enamel panel line washes are the choice many experienced builders prefer for sharp definition. They flow beautifully into fine recessed detail and can produce very clean results with careful cleanup. They also demand more care. Bare plastic, especially stressed or thinner parts, can be vulnerable if enamel products pool in corners or around joints. Applied over a protective gloss coat, they are far safer and easier to control.
Choosing the right panel line colour
Black is not always best. It gives maximum contrast, but on white parts it can look harsh, and on darker colours it can disappear. Grey often looks more scale-appropriate on white, light grey and pale blue armour. Brown is useful on red, yellow and warmer tones where black can feel too stark.
This is where personal preference comes in. If you want anime-style contrast that reads strongly on the shelf, black lines can suit that look. If you prefer a more restrained finish, use softer tones that support the kit rather than dominate it. There is no single correct answer, but there is a clear difference between high contrast and natural-looking definition.
Surface prep before you start
The cleanest panel lining starts before any ink or wash touches the kit. Remove nub marks properly, tidy rough edges and clear dust from the parts. If a line is partially blocked by sanding residue or a burr from the mould, the wash will not flow evenly.
For builders working on bare plastic, make sure your hands are clean and the parts are free from skin oils. If you are painting the kit, a gloss surface is the best base for enamel washes and generally makes cleanup easier. Matte and satin finishes create more drag, which can leave staining around the line.
If you plan to use decals and a final top coat, think about the order. A common workflow is paint, gloss coat, panel line, decals, then final top coat. Straight-build kits are more flexible, but it still helps to decide in advance whether you want a matte, satin or gloss finish at the end.
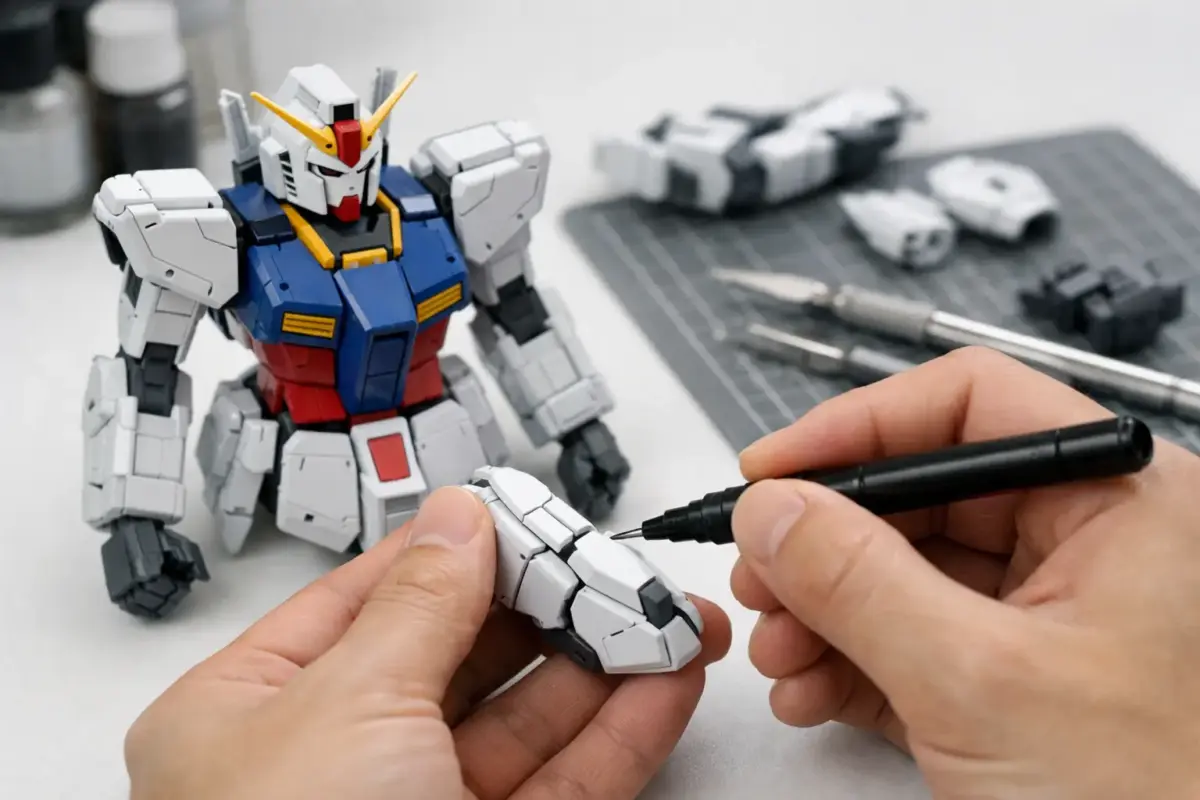
How to apply panel lines cleanly
With a fine-tip marker, use light pressure and work in short sections rather than trying to draw one long continuous line. Let the recessed detail guide the nib. If the line looks faint on the first pass, allow it to dry briefly and reinforce it rather than pressing harder.
With a pour-type marker or enamel wash, touch the applicator to the panel line and let capillary action do the work. You do not need to paint the whole channel manually. In fact, overloading the line is one of the main causes of mess. Small amounts, placed accurately, are usually enough to run much further than expected.
It also helps to line parts before full assembly where possible. Working on an armoured skirt, shield half or leg panel while it is still separate gives you better access and reduces the chance of wash creeping into seams and joints.
Cleanup matters as much as application
A slightly messy application can still end well if the cleanup is controlled. Marker lines can often be refined with a cotton bud, a soft eraser, or a small amount of suitable thinner on a bud depending on the product. Enamel wash is normally cleaned back with enamel thinner or lighter fluid applied sparingly to a cotton bud or soft cloth.
The key word is sparingly. Flooding thinner over the part defeats the point of precise lining and increases the risk of damaging the surface underneath. Wipe across the line rather than along it, and rotate to a clean section of the bud frequently. If you smear dirty thinner around a white part, you create more work for yourself.
Common mistakes in any gunpla panel lining guide
The most common mistake is using too much product. Excess wash collects at line ends, pools around corners and can stain nearby detail. It is better to make two controlled applications than one heavy one.
The second is ignoring plastic type. Gundam kits can use a mix of polystyrene and ABS. Some panel lining products are less forgiving on ABS, particularly if left to sit in stressed areas. If a part includes joints, clips or thin pegs, treat it cautiously and avoid letting enamel wash gather there.
Another frequent issue is lining over a rough finish. Matte paint and unsealed decals do not give you much margin for error. Cleanup becomes patchy, and staining is harder to remove. If you want the crispest result, gloss first.
Then there is scale and style. Not every line needs the same weight. On smaller HG kits, heavy black lining on every recess can make the model look busy. On larger MG or PG kits, stronger definition often works better because the surface detail is broader and more visible.
Which method suits your build?
If you are new to Gunpla and building mostly unpainted kits, start with a fine-tip or pour-type marker. You will get fast results, learn where panel lines add the most visual value, and keep the risk level low.
If you already paint your kits or want a cleaner, more professional finish, enamel wash over a gloss coat is the stronger option. It is especially useful on kits with dense surface detail, verniers, vents and layered armour where hand-drawing each line becomes tedious.
If your build includes ABS-heavy sections, older kits, or parts under stress, be selective. You do not need to use one method on the entire model. Many builders combine techniques, using markers on vulnerable parts and wash on safer outer armour.
Top coat and final finish
Once the panel lines are fully dry and any decals are in place, a top coat helps protect the finish and unify the sheen. Matte top coat is popular because it tones down the plastic look and makes surface detail read more clearly. Satin keeps a slight manufactured feel that suits some mobile suits well. Gloss is less common for a final Gundam finish but can work on specific builds or polished custom schemes.
Always check that your panel line medium is properly cured before spraying. Rushing this stage can lead to smearing or frosting problems that are much harder to fix than a minor lining error.
For modellers sourcing a full project in one go, it helps to think in workflow terms rather than individual items – lining tool, cleanup product, suitable coat, and any decals or weathering materials that follow. That approach usually saves both time and frustration, which is exactly how we encourage customers to shop at Scale Model Shop.
Panel lining is one of those skills that improves quickly once you stop chasing perfection on the first part. Start with the most visible armour sections, keep your application controlled, and let the kit show you how much contrast it really needs. Clean lines beat heavy lines every time.