
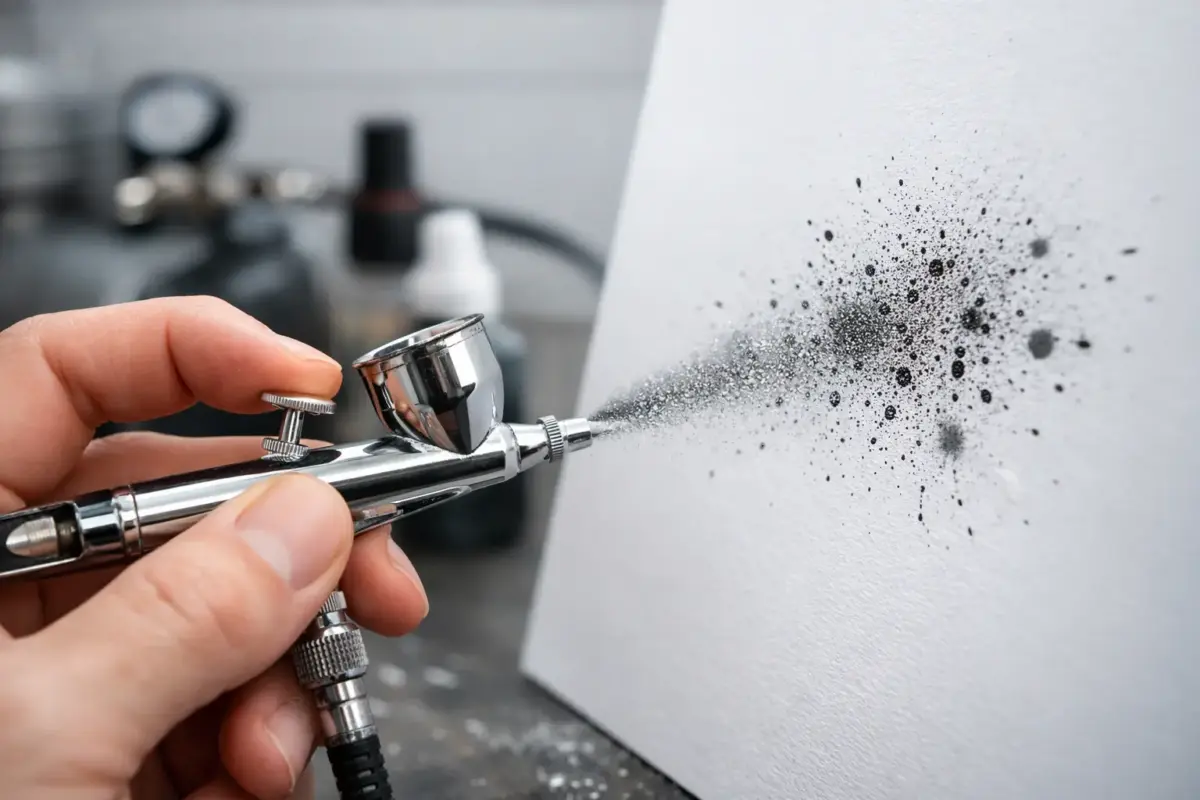
A clean base coat should settle into an even, controlled film. When the airbrush starts throwing random dots, blobs or a grainy spray pattern instead, it can ruin a carefully prepared aircraft fuselage, armour hull or figure in seconds. If you are asking why is airbrush spattering, the answer is usually not one dramatic failure. It is normally a small mismatch between paint, air pressure, cleanliness and the way the airbrush is being used.
The good news is that spattering is highly diagnosable. Work through the symptoms methodically rather than immediately stripping the model or changing every setting at once. A few test passes on a spoon, paint mule or sheet of paper will usually reveal where the problem begins.
What airbrush spattering actually looks like
Spattering is an uneven release of paint from the nozzle. Instead of a consistent fine mist, the airbrush deposits isolated larger droplets, intermittent blobs or a visibly coarse texture. It may happen only when you first pull back the trigger, when spraying close to the surface, or after a minute or two of otherwise good spraying.
Do not confuse it with deliberate mottling, dry spraying or an orange-peel finish. Dry spray generally looks dusty because paint has begun drying before it reaches the model. Orange peel is a textured coat caused by paint that has not levelled properly. Spatter is more abrupt: the airbrush briefly releases too much paint, often in a distinct spot.
The timing gives you a useful clue. A splutter at the start of every pass often points to paint collecting around the needle tip. Spatter that develops as you paint is commonly tip dry or a partial blockage. A repeating pulse throughout the pass can indicate inconsistent airflow, a loose nozzle or a feed problem.
Why is airbrush spattering? Start with paint consistency
Paint that is too thick is the most common cause. It cannot atomise cleanly through the nozzle, so pressure builds behind the restriction and paint releases in uneven droplets. This is especially likely with heavily pigmented acrylics, metallics, primers and older bottles where the contents have settled.
Stir and shake the paint thoroughly before thinning it. Pigment left on the bottom of the bottle does not make a reliable airbrushing mix. Decant a small amount into a mixing cup, then add the thinner recommended for that paint range gradually. The ideal consistency varies by brand, nozzle size, colour and finish, so there is no universal mixing ratio that works every time.
As a useful starting point, many hobby acrylics spray comfortably once thinned to the consistency of semi-skimmed milk. That familiar comparison is only a guide. A 0.2 mm detail nozzle needs a finer mix than a 0.4 mm nozzle used for priming a 1/35 tank. Lacquer paints may tolerate stronger thinning, while water-based acrylics often benefit from their own dedicated thinner and, in some cases, a small amount of flow improver.
Using the correct thinner matters. Water may work in an emergency with some water-based acrylics, but it can weaken binding properties and make drying behaviour less predictable. Mixing incompatible paint and thinner can cause clumping, separation or a stubborn residue in the nozzle. For reliable results, keep each paint system with its matching thinner wherever possible.
Tip dry causes sudden blobs during acrylic spraying
Tip dry occurs when acrylic paint begins to dry on the exposed needle tip. The coating partly blocks airflow and disrupts atomisation. Eventually the accumulated paint breaks loose or changes the spray pattern, leaving a blob or scatter of droplets on the model.
It is common when using fast-drying acrylics, spraying in a warm room, working at higher pressure or spending a long time on fine camouflage lines. You may notice that the airbrush sprays well immediately after cleaning the needle, then deteriorates within a few minutes.
Keep a cotton bud or soft brush lightly moistened with suitable cleaner nearby. Pause regularly and wipe the needle tip gently, taking care not to bend it. Reducing air pressure slightly, thinning the paint a little further and adding a compatible flow improver can all extend spraying time before tip dry returns. Do not flood the cup with additives, however. Too much can slow curing or alter the finish.
For fine work, use short controlled bursts rather than holding the trigger open while deciding where the next line will go. Air first, then introduce paint, and release paint before turning off the air at the end of the pass. This habit helps keep paint from collecting at the nozzle.
Check pressure, distance and trigger control
Higher pressure is not automatically the cure for thick paint. It may force an unsuitable mix through the nozzle, but it can also create overspray, dry spray and a rough finish. Conversely, pressure that is too low may not atomise paint adequately, producing a coarse or intermittent pattern.
For many modelling paints, a sensible working range is roughly 15 to 25 psi, adjusted to suit the paint and task. Fine detail may need less pressure with a well-thinned mix; broad coverage, varnish and primer may need more. Your compressor gauge is a starting point, not a substitute for a test spray.
Spraying too close is another frequent contributor. A large volume of paint delivered at close range cannot disperse across the surface and forms wet spots that resemble spatter. Move the airbrush back slightly and build coverage with several light passes. For broad coats, keep the brush moving before you introduce paint and continue the movement until paint flow has stopped.
If the problem happens only at the beginning of a pass, review trigger control. Press down for air first, pull back gently for paint, then push forward to stop paint before releasing the air. This prevents the little burst of paint that can appear when air and paint are started or stopped together.
A partial blockage can make an airbrush spit
Even a nearly clean airbrush can have enough dried paint in the nozzle or around the needle packing area to affect the spray. A partial blockage is particularly likely after spraying primer, metallics, varnish or paints with a high pigment load. The airbrush may appear fine when spraying cleaner, yet spit as soon as paint is added.
Remove the needle carefully and inspect its tip under good light. A dried ring of paint near the point is enough to disrupt performance. Clean it by wiping away from the sharp end, not towards it. Inspect the nozzle too, using the appropriate cleaning brush or a soft interdental brush. Avoid forcing hard tools into a fine nozzle, as a scratch or distortion can permanently spoil the spray pattern.
Backflushing can loosen residue in the paint channel, but use it with restraint. Cover the nozzle with a cloth or cap, introduce a little cleaner, then gently allow air to bubble back into the cup. Do not force cleaner through a badly blocked airbrush at full pressure. Remove and clean the affected parts instead.
After a colour change, flush until the cleaner runs clear, then wipe the cup and needle. At the end of a session, carry out a proper clean rather than relying on a quick rinse. This takes less time than rescuing a spattered gloss coat the following evening.
Look for mechanical and air supply faults
If paint thinning and cleaning do not solve the issue, inspect the airbrush itself. A nozzle that is not seated correctly can allow air into the paint path, creating bubbles in the cup and an inconsistent spray. Check that the nozzle cap is secure and that any seal is clean, present and undamaged. Do not overtighten delicate threaded nozzles.
A bent needle tip can also cause an uneven pattern. Roll the needle on a flat, clean surface and inspect the point from several angles. Minor damage sometimes can be carefully polished, but replacing a bent needle is usually the safer option for predictable fine work.
Moisture in the airline is another culprit, particularly in a cool workshop or during longer sessions when a compressor warms up. Water droplets entering the airflow can make paint sputter, even when the paint mix is correct. Drain the compressor moisture trap regularly and fit an inline moisture filter close to the airbrush if your setup does not already have one.
Check the hose connection and compressor behaviour as well. A leaking hose, loose fitting or unstable compressor can cause pulsing airflow. If the spray alternates between normal and weak without a clear paint-related reason, test with clean air or cleaner before changing the paint mix again.
A quick fault-finding routine before painting the model
Before returning to the kit, test your airbrush on paper at the same pressure and distance you plan to use. This short sequence prevents guesswork:
- Spray cleaner or suitable thinner first. If it pulses or sputters, investigate airflow, the nozzle and cleanliness.
- Add a freshly mixed, properly thinned paint sample. If spattering begins now, adjust the paint mix before raising pressure.
- Wipe the needle tip and test again. An immediate improvement points to tip dry.
- Try a slightly wider distance and lighter trigger pull. If the finish improves, technique and paint volume were contributing.
Only change one variable at a time. If you thin the paint, increase pressure, change distance and clean the nozzle simultaneously, you may fix the issue but learn nothing useful for the next session.
Preventing spatter on future builds
Consistency comes from treating the airbrush as part of the finishing process, not simply a delivery tool for paint. Mix paint in small batches, filter mixes for very fine nozzles when needed, test every new combination of paint and thinner, and keep the needle tip clean while working. Store paints with their lids secure, as partially evaporated paint can become thicker long before it looks obviously dried out.
Match the nozzle to the job. A larger nozzle is more forgiving for primer and overall coverage, while a fine nozzle earns its place on mottling, marbling and tight camouflage. Trying to push heavy primer through a detail setup is a reliable route to frustration.
Every modeller eventually has a spatter episode, including experienced builders. The useful response is not to keep spraying and hope it disappears. Stop, test on paper, identify whether the fault is paint, airflow, cleanliness or control, and make one measured adjustment. With the right consumables and a repeatable cleaning routine, your airbrush will become one of the most dependable tools on the bench.
